This article may contain affiliate links. If you buy some products using those links, I may receive monetary benefits. See affiliate disclosure here
In this review, we will take a look at KeyCDN, a content delivery network that many WordPress users rely on. Founded in 2012, its Headquarters is in Switzerland. They have also partnered with other performance-focused providers like Kinsta and Optimizing Matters (the creators of the Autoptimize plugin).
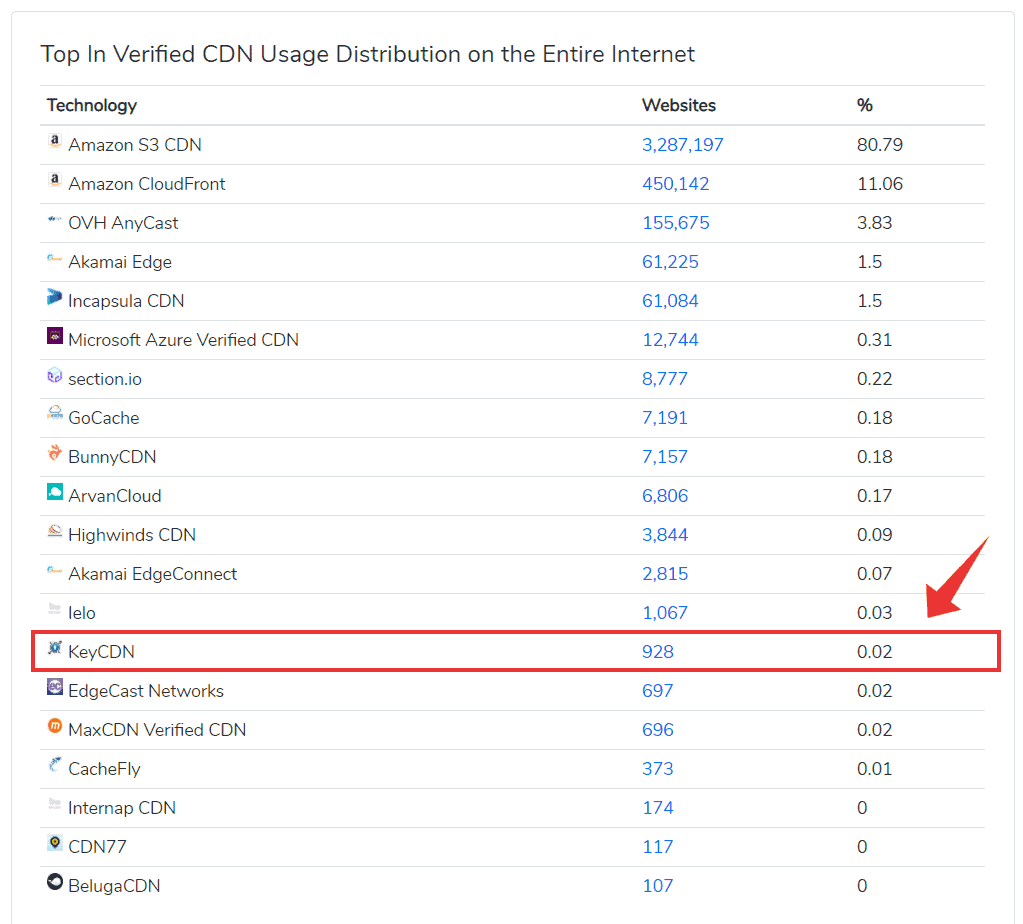
According to Builtwith, KeyCDN stands at the 13th position in terms of market share. That means, out of all the websites in the entire internet that use a CDN, around 8900+ use KeyCDN.
Currently, I use BunnyCDN (8th in the above list). KeyCDN is another option I would consider if I need an alternative.
You might also like:
With that, let us discuss the pricing, features, and performance of KeyCDN.
Pricing
KeyCDN offers two types of CDNs - Pull and Push. For Pull zones, the pricing is for the bandwidth only. An account allows upto three zones. Additional zones cost $1 each.
There is no charge for requests. So, unlike enterprise-level CDNs like Google Cloud and AWS Cloudfront, the pricing structure is a lot simpler to understand for beginners.
However, the cost varies between different regions. North American locations have the lowest price - $0.04/GB. Whereas Asia-Pacific and South America/South Africa have almost double - $0.10/GB and $0.11/GB respectively.
In addition to these bandwidth costs, Push zones charge you for storage also. The cost of storing the first 500GB is $0.12/GB/month.
- Min. bandwidth price: $0.04/GB
- Initial storage price (push zones): $0.12/GB/mo
Free Trial
KeyCDN calculates usage based on Credits, and one credit equals one USD.
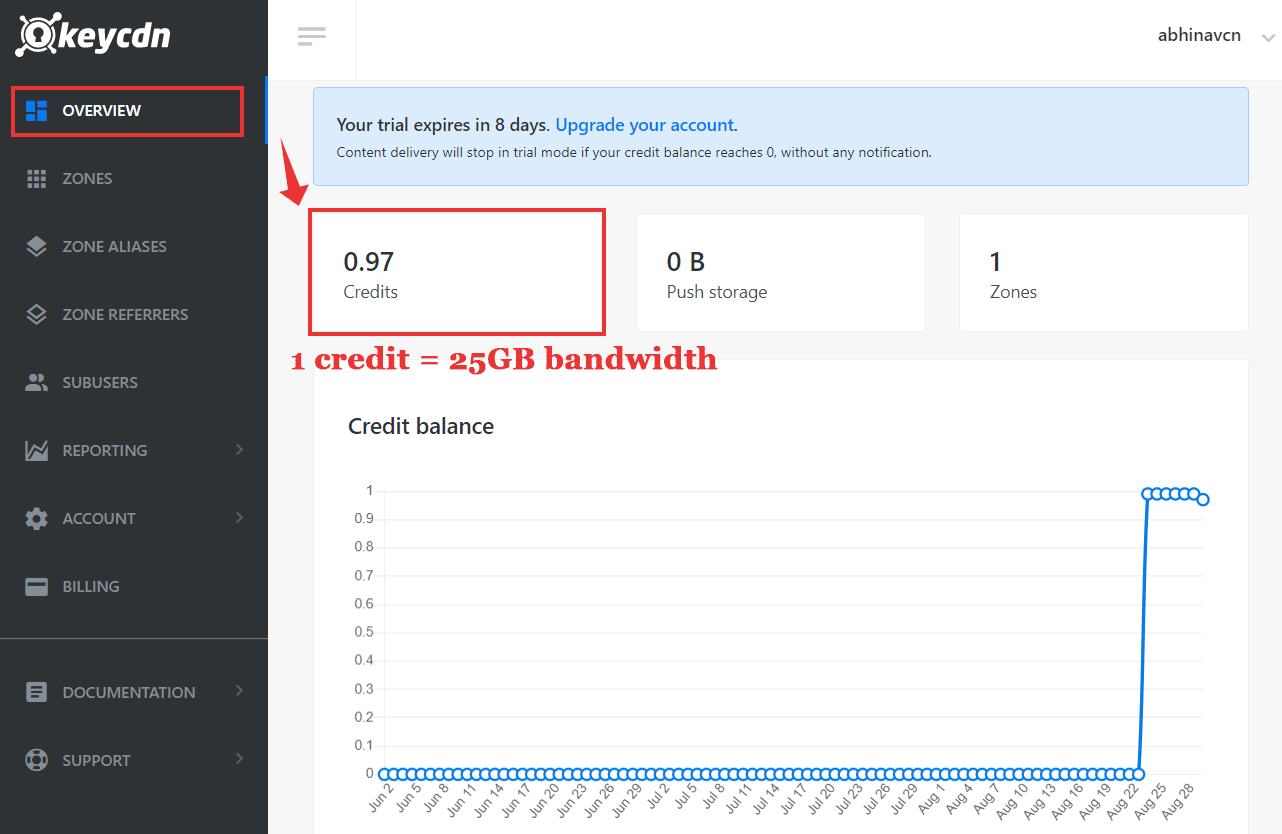
When you signup for an account, you get a 14-day free trial, which allows free bandwidth upto 25GB (1 credit). No credit card required for signing up though. This quota is good enough to try out the service and decide if KeyCDN is right for you or not.
However, if you use up the free quota before the first 14 days, the trial automatically ends. Then you will have to upgrade your account to continue using the services. So, always keep an eye on the Overview tab, where you can monitor your remaining credits.
Remember, one credit amounts to 1USD, which is almost 25GB of bandwidth.
Minimum Charges
There is also a minimum monthly charge of $4/mo. So even if you haven't used any bandwidth during a month, you have to pay the minimum price for any active zones.
However, there is a big caveat. The minimum payment amount is $49, which is almost the minimum price for one year ($4 * 12mo = $48).
For high traffic websites, it may not be a big amount. But for small traffic websites, having to pay $49 upfront can be a deal-breaker. This is the main reason why I stick with BunnyCDN. Their minimum monthly price is just $1 while the minimum payment amount is $10, which is four times cheaper than KeyCDN.
Payment Options
To buy credits, KeyCDN supports two payment methods:
- Credit Cards
- PayPal
The latter is usually my preferred method. However, for automatic payments, you have to use a credit card.
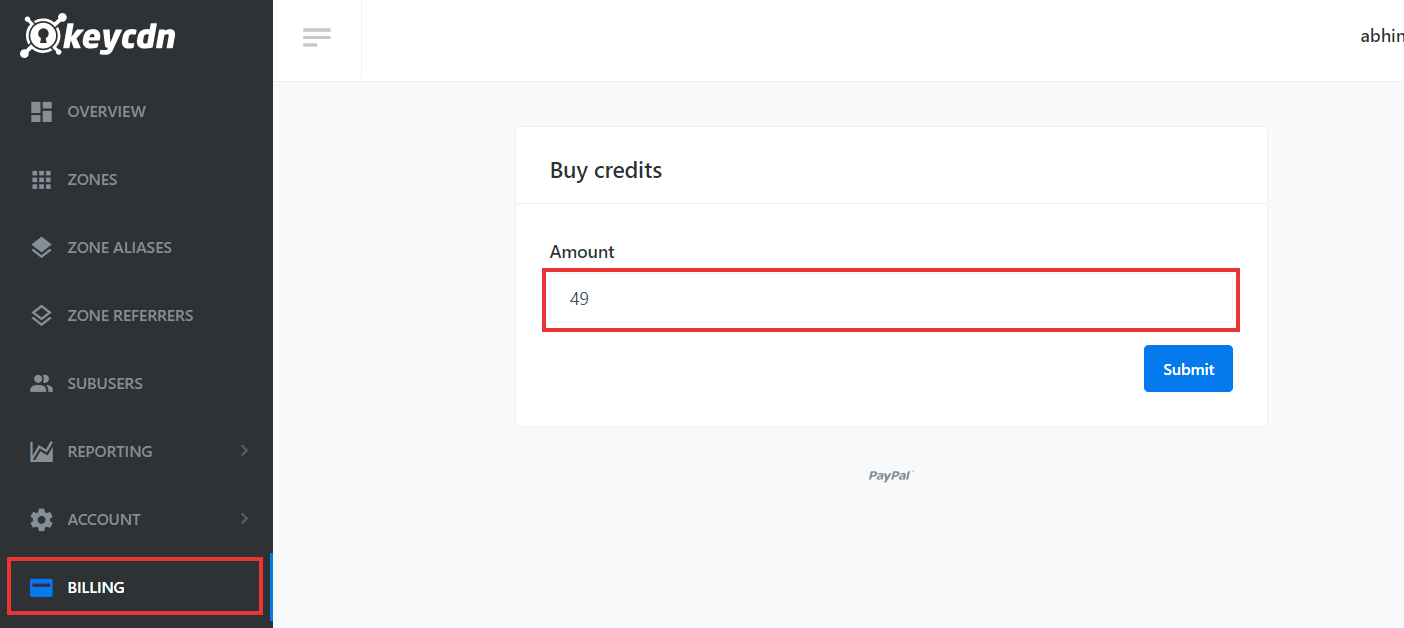
buying credits using paypal - minimum payment is $49
Features & Ease of Use
User Interface
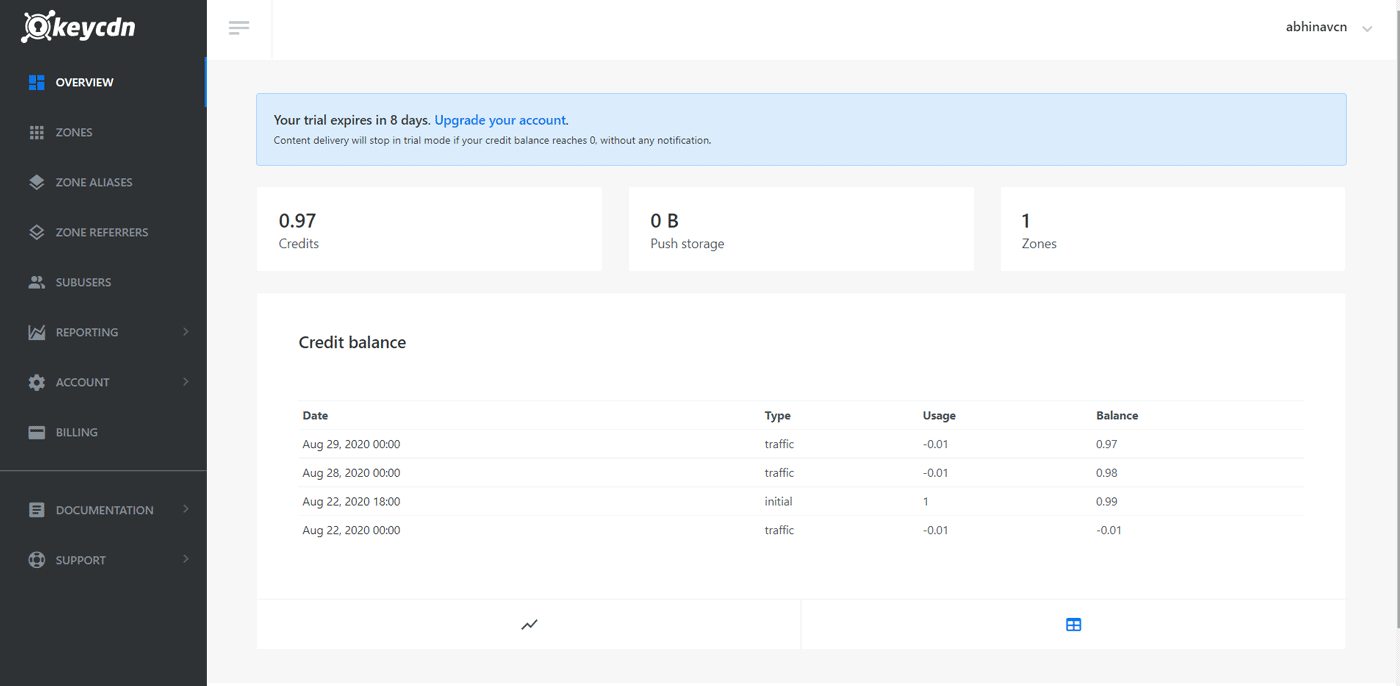
KeyCDN gives a clean user interface to manage your zones. It displays only the relevant details on each page. For example, the Overview page shows your credit balance, storage size, and the number of zones, along with a usage graph and a table.
In comparison, the BunnyCDN dashboard felt more complex to me. Whereas you don't have much to get confused while navigating KeyCDN dashboard.
Data Centers and Edge Locations
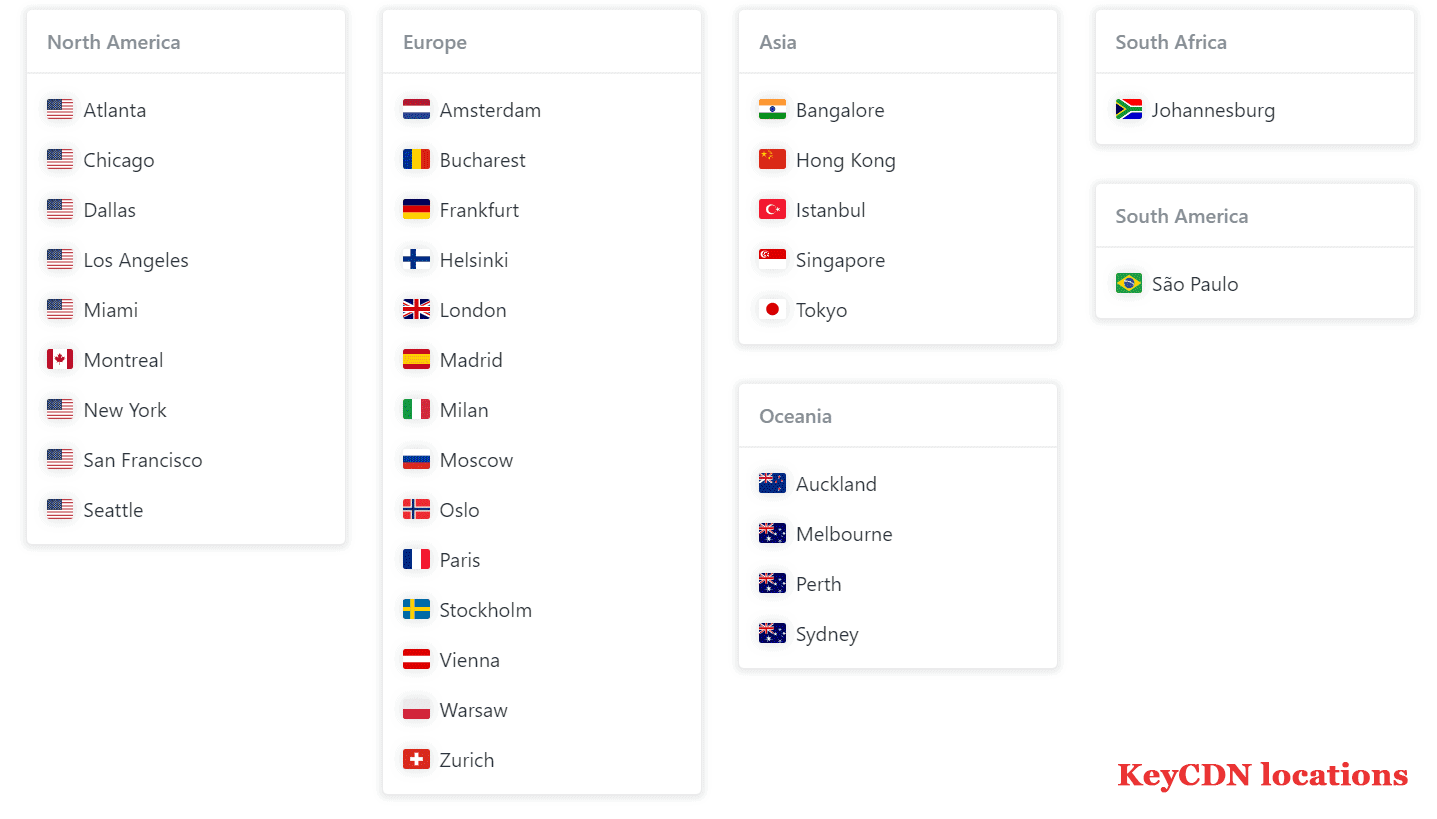
As of writing this review, KeyCDN has data centers in 39 locations worldwide. They have a great presence in the Asia-Pacific region as well, with PoPs in India, New Zealand, Japan, and many more.
In addition, there are five more locations coming soon - three in South America and two in Asia.
As per their website, they use tier 1 networks to distribute the data, with necessary certifications in place (like ISO 27001).
CDN Zones
As I have mentioned above, KeyCDN supports two types of zones:
- Pull Zones
- Push Zones
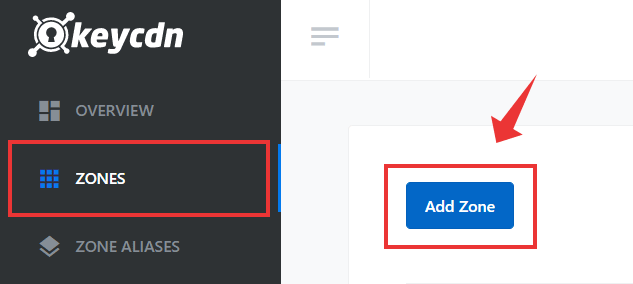
To create either of it, go to the Zones menu and click Add Zone.
Pull Zones
With Pull Zones, you set the origin hostname as your website's URL. Later, when a request hits your Pull Zone, it retrieves the file from your origin server and sends it to the user. In addition to that, the file will be copied in the edge location's cache for later use.
For example, you have a file at yoursite.com/image.jpg, and your Pull Zone's URL is yourzone.kxcdn.com. When a request hits the URL yourzone.kxcdn.com/image.jpg from London, KeyCDN pulls the image from your server and store it at an Edge Server in London. So, subsequent requests for the same image from London will be served super-fast from that Edge Location. Thus it reduces the load on your origin server.
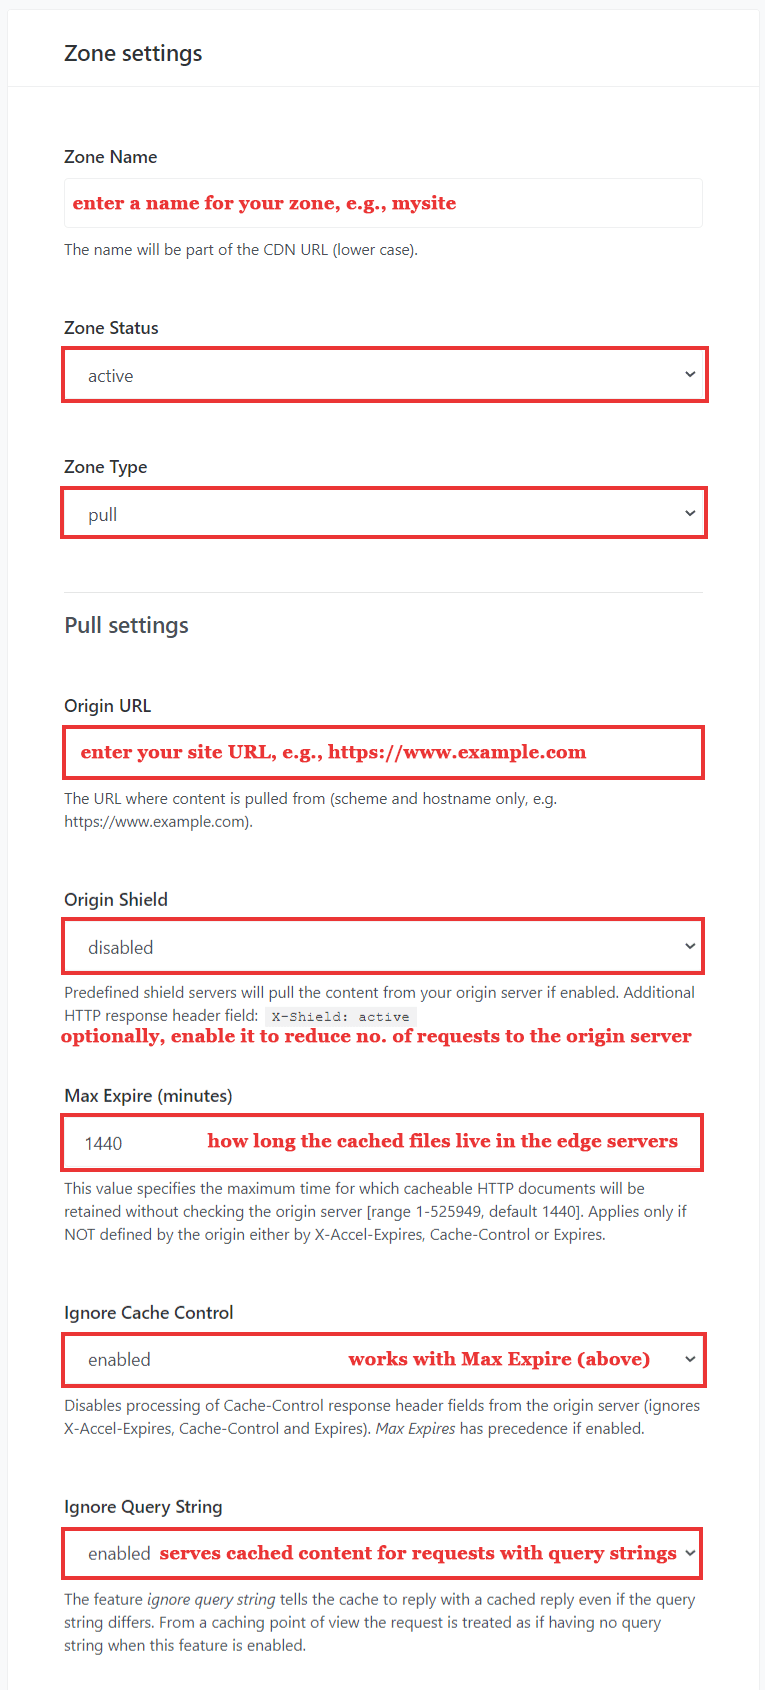
There are almost twenty different settings you can configure while creating a Pull Zone. We will discuss only the important ones:
- Zone Status
- Zone Type
- Origin URL
- Origin Shield
- Max Expire
- Ignore Cache-Control
- Ignore Query String
I hope the settings are self-explanatory from the above image. In addition, there are a few more settings that you should know about:
Other Settings:
- Canonical Header: helps to avoid duplicate content problems. Enabled by default.
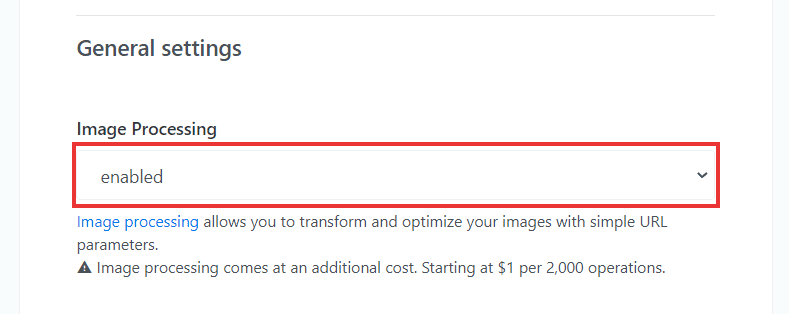
- Image Processing: KeyCDN supports on-the-fly image optimization, which you can use to resize and optimize images based on simple GET parameters. It supports WebP as well. However, enabling this feature costs extra. By default it is disabled.
- Expire (minutes): This sets the Cache-control and Expires response headers for browser caching. Don't confuse it with the Max Expire we discussed above, which sets the cache expiry on the server.
- SSL: KeyCDN supports three types of SSL certificates: shared, Let's Encrypt, and custom certificates. Shared is the default, which works for the default kxcdn.com hostname. However, if you plan to use a custom subdomain, change it to Let's Encrypt.
- Secure Token: Helps to limit the access to the files in a zone.
Deploying a zone can take upto ten minutes to complete. After that, you can view it or edit it from the Zones section.
Push Zones
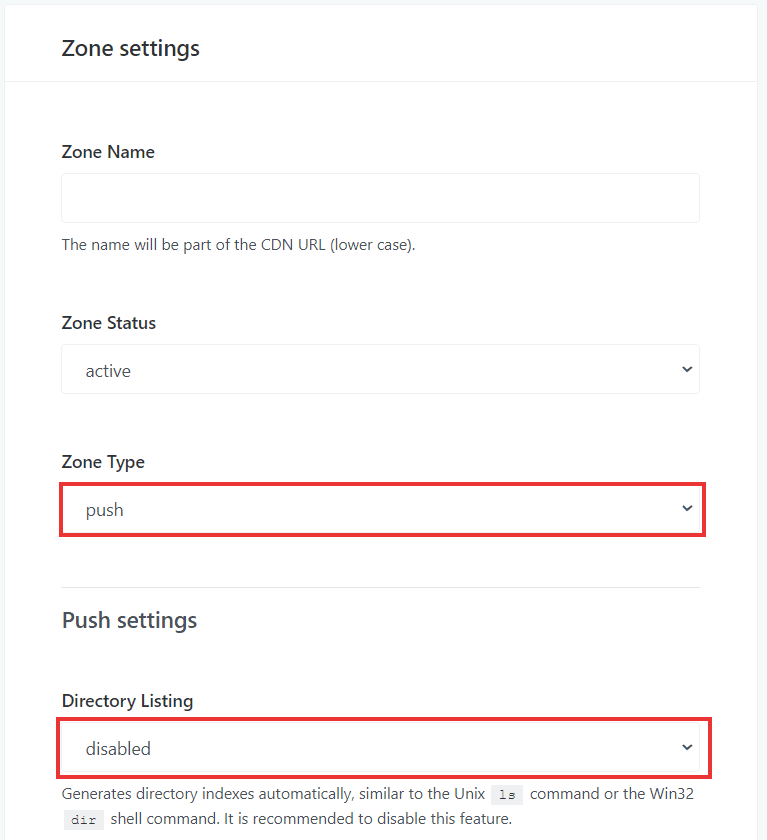
To create a push zone, just set the zone type to Push in the Add Zone page. Compared to Pull Zones, Push Zones have fewer configuration options. The only important setting is Directory Listing, which you should keep disabled.
Unlike Pull zones, Push zones do not require an origin URL. Instead, you have to manually upload the files to the zone. For that, you can use two methods:
- FTP(S)
- rsync over SSH
However, I couldn't find any details about uploading via API. Whereas BunnyCDN's storage zones support API uploads as well as web-interface uploads.
Also, remember that Push zones incur an extra charge of $0.12/GB of storage per month. There are a few limits too:
- 250K Inodes
- Max file size is 5GB
Zone Aliases with Let's Encrypt SSL
The default hostname for your KeyCDN zone is a subdomain ending in kxcdn.com. With Zone Alias, you can set a hostname based on your site's domain name. Example: cdn.mysite.com. It supports SSL too.
Before adding an alias, make sure you do the following two things:
- Enable Let's Encrypt or Custom SSL for the zone: the default SSL setting is 'shared' which only works for the default hostname. But if you want SSL support for a custom subdomain (you should), make sure you change it to 'letsencrypt'. Or else, if you want to install a custom certificate, you should select the 'custom' option.
- Add a CNAME DNS record for your domain: for the zone alias to work, you should set a CNAME record. For that, you have to edit your domain's DNS zone file. Most likely it will be on your domain registrar or hosting provider.
But here, I am using Cloudflare to manage my DNS records. So here is how I did it:
With Cloudflare, you don't have to wait for hours for the DNS edits to take effect. That's why I suggest you also to use it.
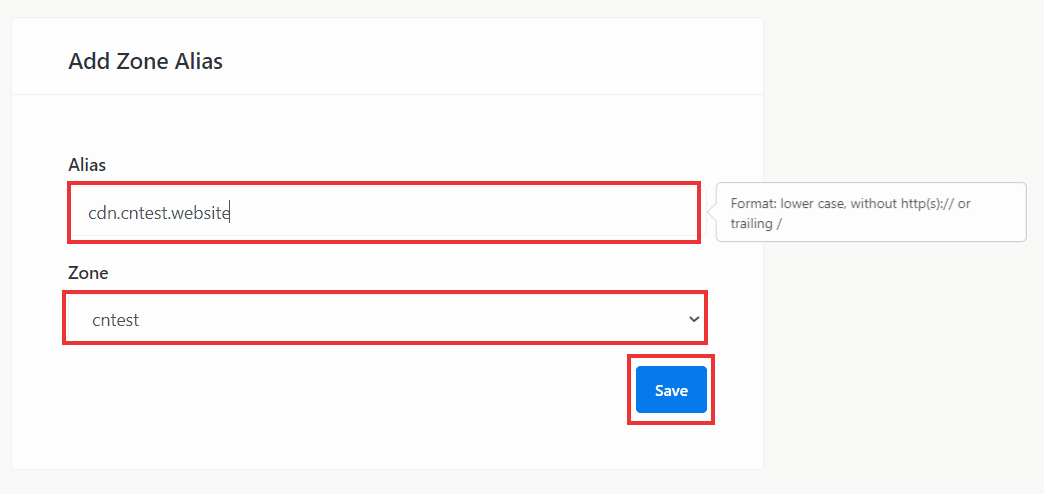
After adding the record, come back to your KeyCDN dashboard and click Add Zone Alias.

Then enter your subdomain, followed by selecting the Zone for which you want to set the Alias.
It might take a few minutes for the changes to get deployed. In the meantime, KeyCDN generates and installs a custom Let's Encrypt SSL certificate for your subdomain.

the color changes from yellow to green once the deployment is complete
Keep refreshing your Zones page to see if the deployment is complete. Once complete, try loading a resource from the custom subdomain to verify it's working.
Zone Referrers
By default, anybody can link to your resources from any web page. It's called hotlinking, which allows others to exploit your bandwidth.
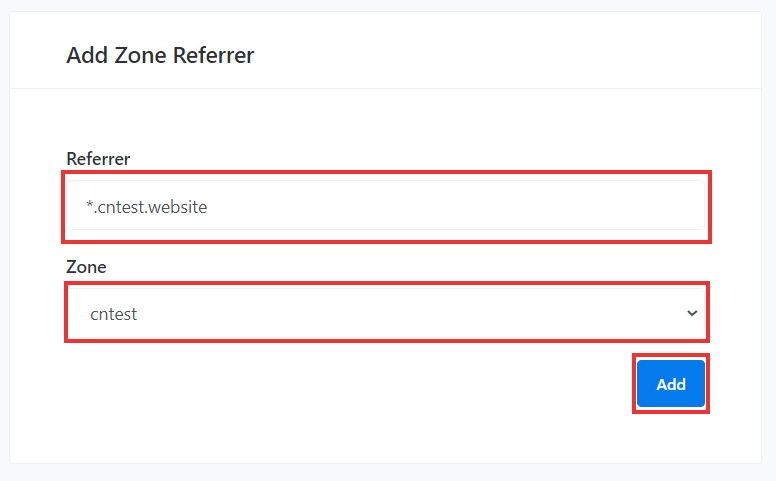
By setting Zone Referrers, you allow accessing CDN files from your domains only - an effective way to counter hotlinking. While adding referrers, make sure you add at least the following referrers:
- Any Zone aliases you've set (you can use a wildcard *.mysite.com to allow all subdomains)
- The root domain
- The default zone URL
Full Cache Purge and File Purge
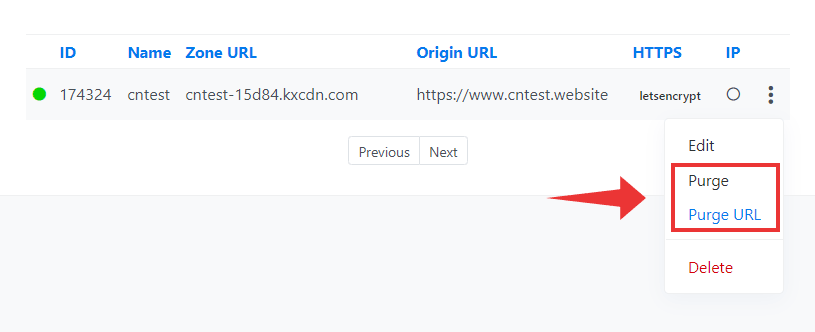
KeyCDN allows both purging the full cache or purging individual files. When I tested it on a pull zone, the result was almost instant.
Image Processing
Not just serving cached content, KeyCDN offers on-the-fly image processing as well. You can enable it for each zone. After that, you can append simple query strings to the image URLs to process them. The API supports cropping, resizing, webp conversion, and more such operations.
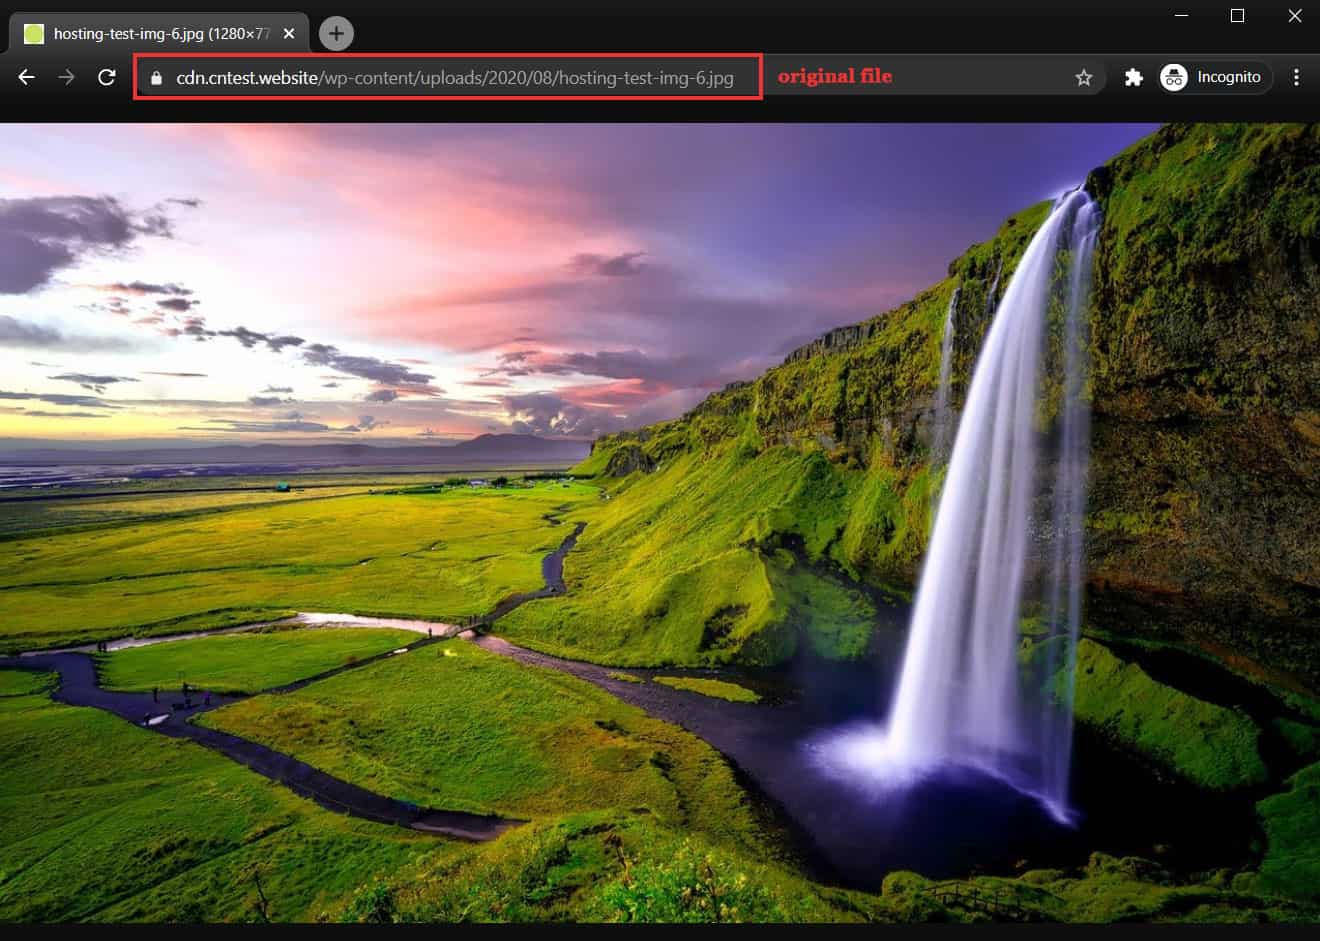
For example, here is an original image on my website:
If I want to resize it to 600x400px, I can do it by adding 'width=600&height=400' at the end of the URL. Here is the resized image returned by KeyCDN's image processor:
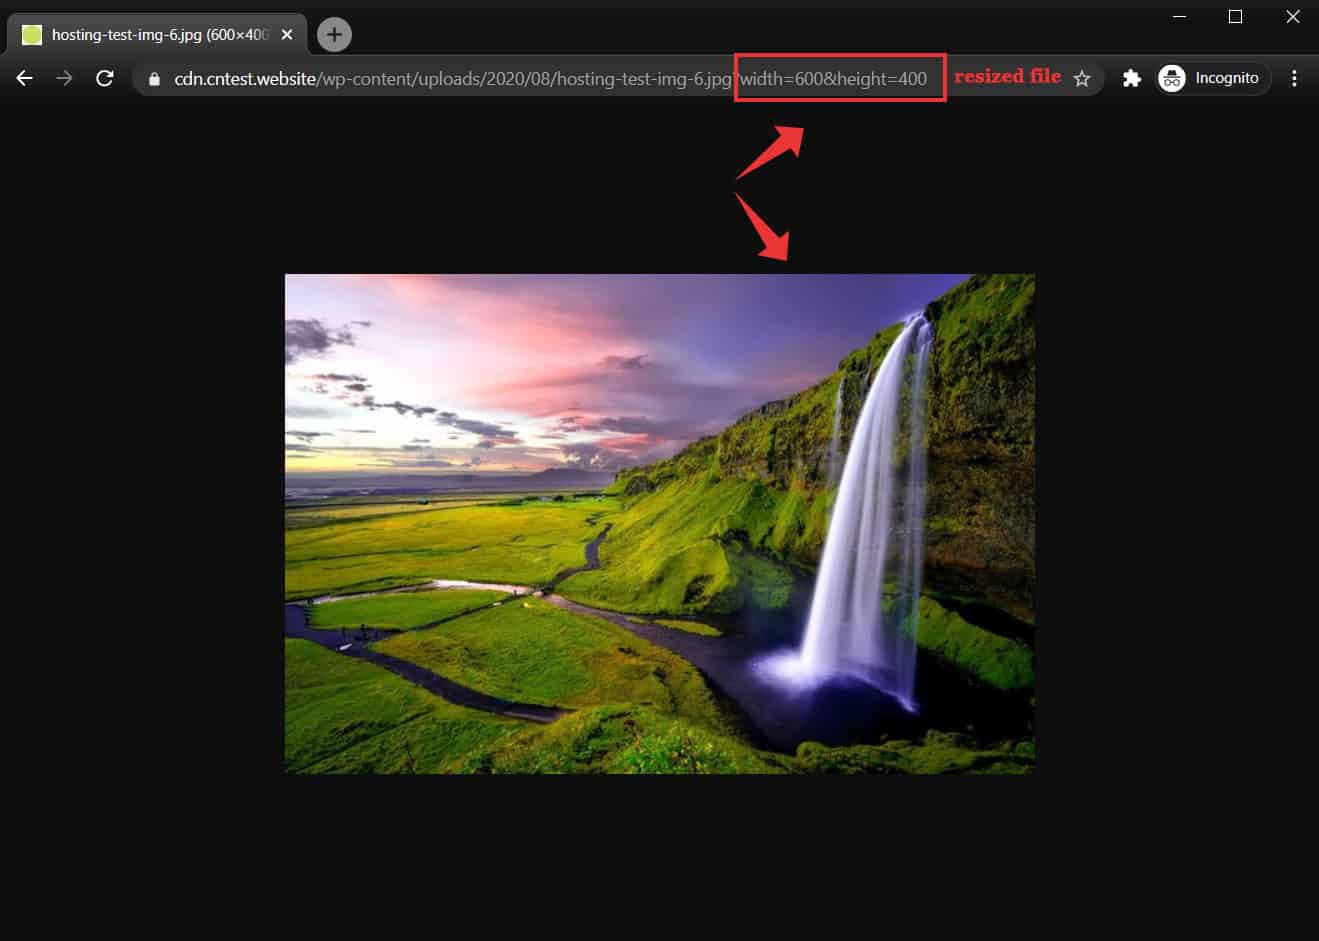
If you get 'serve scaled images' warning in Google PageSpeed Insights, KeyCDN's image processor is a great way to solve it.
However, you need to figure out a way to append the proper parameters at the end of image URLs. For instance, to use it with WordPress images, you might need some custom Javascript code to find out the device width.
- The price for image processing is $0.40/1000 operations.
- Supports WebP conversion
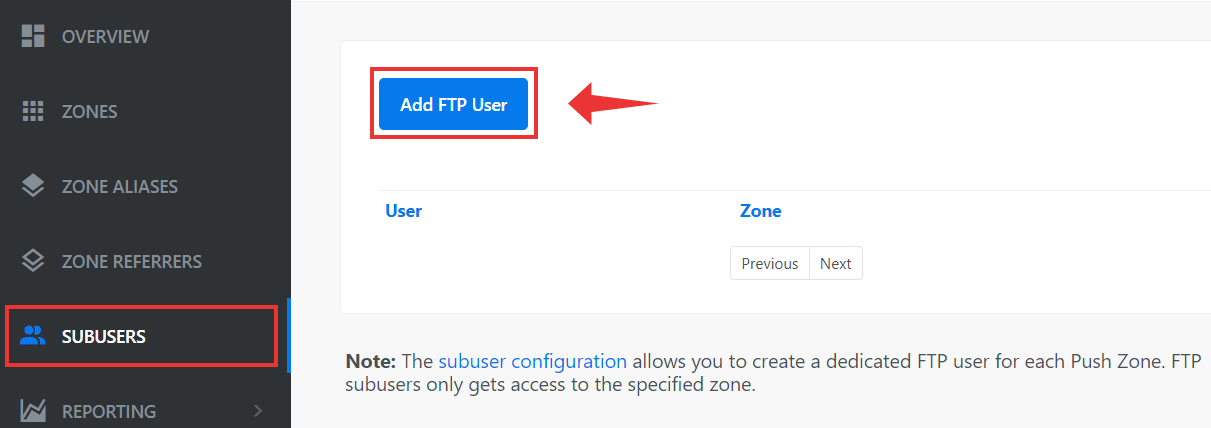
FTP Access (Sub-users)
On this page, you can add FTP users for your Push zones.
Monitoring Usage
The Reporting page is quite basic, including only the necessary details. You can see two sections here:
- Usage: On this page, you can view the bandwidth, no. of requests served, and cache hit ratio over a period of time. Below that, you can find data related to your Push zones (storage), and image processing usage.
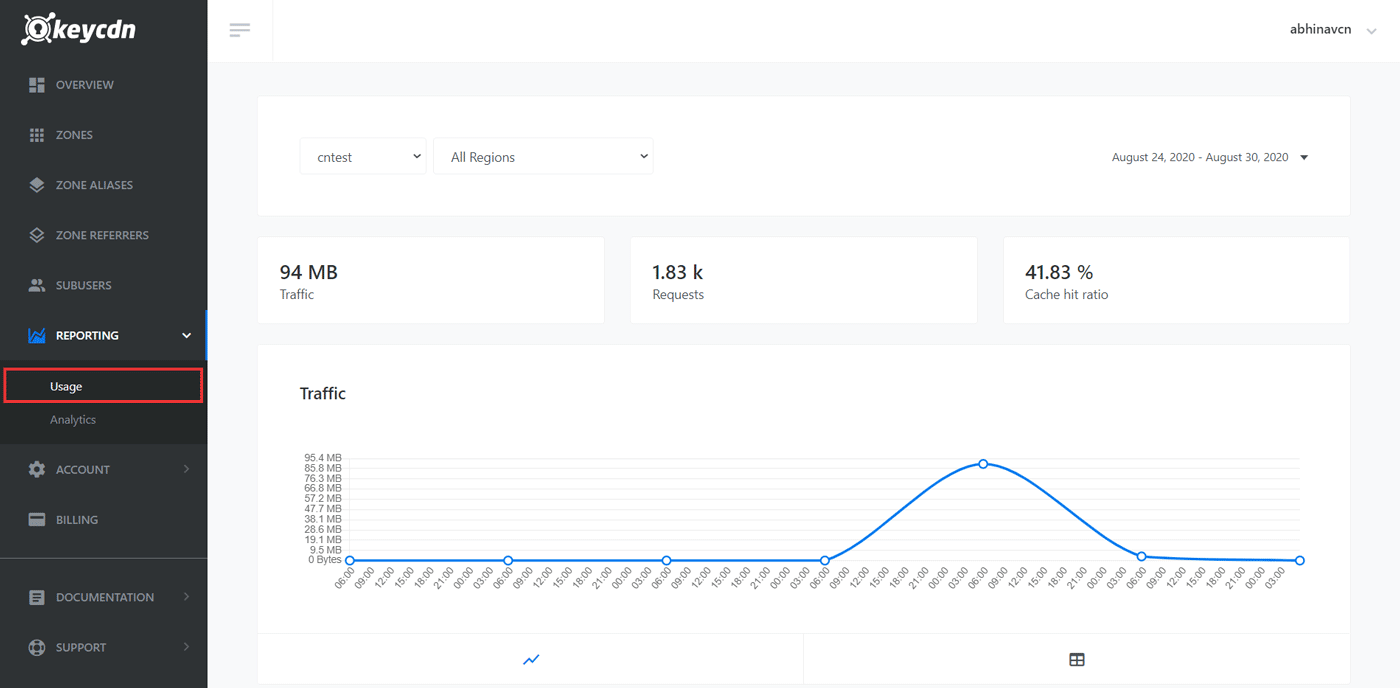
Usage reporting
- Analytics: Here you can view the HTTP status codes, which is helpful in finding any errors or troubleshooting issues.
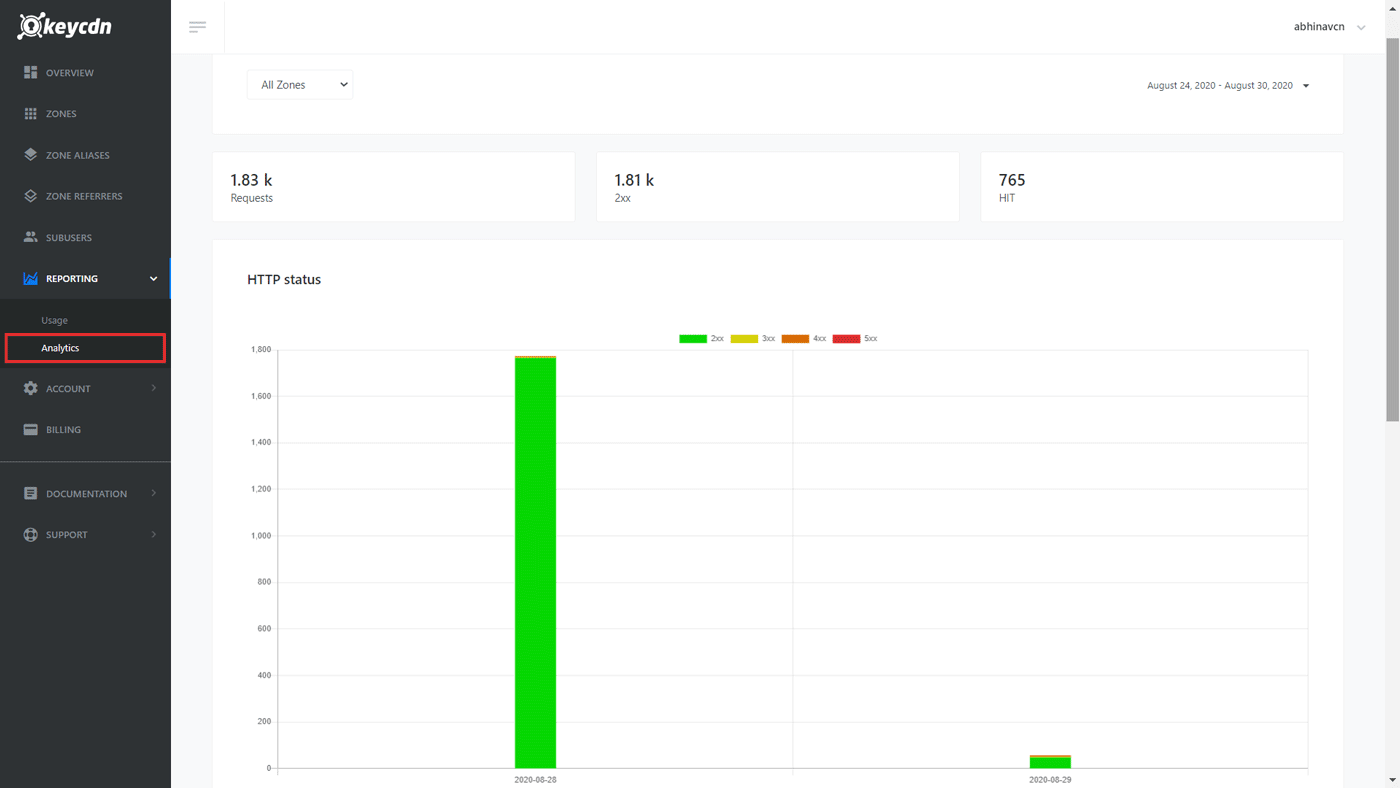
Analytics reporting
Performance
To assess the performance of KeyCDN, I created a sample WordPress site using Elementor and the free Astra theme. The page contained a couple of images and some text. Here is a breakdown of the details:
- No. of requests: 38
- root domain - 2
- subdomain (CDN) - 31
- Google fonts (external) - 5
- Page size: 1.6MB
- CDN integration & page caching using W3 Total Cache
First, I tested the base loading time without any CDN (second column in the below table). The third column shows the loading times right after a cache purge. And the last column shows the loading time when all the CDN requests were a HIT.
Note: to find whether a request is a hit or a miss, check the cdn-cache response header. For hits, it will be cdn-cache: HIT, and for misses, it will be cdn-cache: MISS.
| Location | without CDN | with KeyCDN - cache MISS | with KeyCDN - cache HIT |
|---|---|---|---|
| Tokyo | 1.57s | 4.63s | 854ms |
| Frankfurt | 893ms | 2.87s | 563ms |
| London | 801ms | 2.52s | 519ms |
| Washington D.C | 301ms | 768ms | 318ms |
| San Francisco | 814ms | 2.46s | 512ms |
| Sydney | 2.11s | 6.94s | 1.08s |
| Sao Paulo | 1.18s | 16.97s | 673ms |
| Average | 1.095s | 5.308s | 646ms (41% faster) |
tests using Pingdom Tools
As you can see in the third column, the loading times were quite slow when the resources were not in the cache. Because, the edge servers had to pull the resources from the origin server, which increased latency.
It's the reason why I quite like BunnyCDN's Perma-cache feature. It allows permanently storing the assets in geo-replicated storage zones. So, even if the Pull Zone request is a MISS, pulling from the nearest storage zone is much faster than pulling from the origin server.
With all the requests showing cache HITs, the site become 41% faster, which is a great improvement.
WordPress Integration
To integrate any third-party CDN, you have to replace the original asset URLs with that of your CDN. If you already use a caching plugin like WP Super Cache or W3 Total Cache, it includes a feature to replace original file URLs with the CDN URLs.
See also:
Or else, if you need a separate plugin, you can try KeyCDN's CDN Enabler plugin as well.
KeyCDN Review: Pros & Cons
Pros
- Great network with PoPs in all continents
- Easy to use interface
- Offers push zones, pull zones, and origin shield
- Instant purging
- Decent performance
Cons
- The minimum payment is $49
- Cannot connect pull zone with push zone
Conclusion
Overall, my experience with KeyCDN has been good to great so far. There isn't much to complain about. However, the $49 initial payment is a bit high in my opinion. If they could reduce it, KeyCDN would have been an ideal choice for small website owners.
Have you used KeyCDN? What is your experience? Share it below.

