This article may contain affiliate links. If you buy some products using those links, I may receive monetary benefits. See affiliate disclosure here
After installing a WordPress website on a web host, the next thing you want to do is to change its look and feel. The design aspects of any WordPress website is determined by the theme you use.
So, in this post, we will discuss the different ways with which you can install a WordPress theme, or change the existing one. In fact, switching a theme is a simple process if you have been using the platform for a while. But for someone new to WordPress, it may not be like that. So, I will try to explain each step in detail along with screenshots to make it easy for any beginner.
By the way, this article assumes that you are using self-hosted WordPress. Instead if you are on WordPress.Com, the methods can be slightly different based on the plan you are using.
There are primarily three ways with which you can switch a theme:
- Finding and installing a free theme directly from the WordPress Admin area - works for free themes only, but the easiest method.
- Installing a theme from a zip file - works for both free and premium themes.
- Using FTP to upload theme - works for both free and premium, but it's the most difficult method.
Watch Video
If you prefer to learn WordPress by watching videos rather than reading tutorials, then here is a video on the same:
Method #1: Installing a free theme from the WordPress Admin
The official WordPress.Org website has a Themes directory. From there, you can find free themes that you can use on your websites. As of 2021, Twenty Twenty One is the default theme, created by the WordPress team itself. In addition to that, there are several third-party companies and developers who contribute to this open-source directory.
But, to install a free theme, you don't need to go to the WordPress website or download a theme. Instead, you can search for all the themes available in the directory right from the WP admin area, and install them.
These are the steps to follow:
Log in to the Admin area
If you are currently logged out, go to the WordPress login page and login to the dashboard.
Go to the Themes Section
Once you have logged in to the dashboard, go to Appearance > Themes using the menu on the left side.
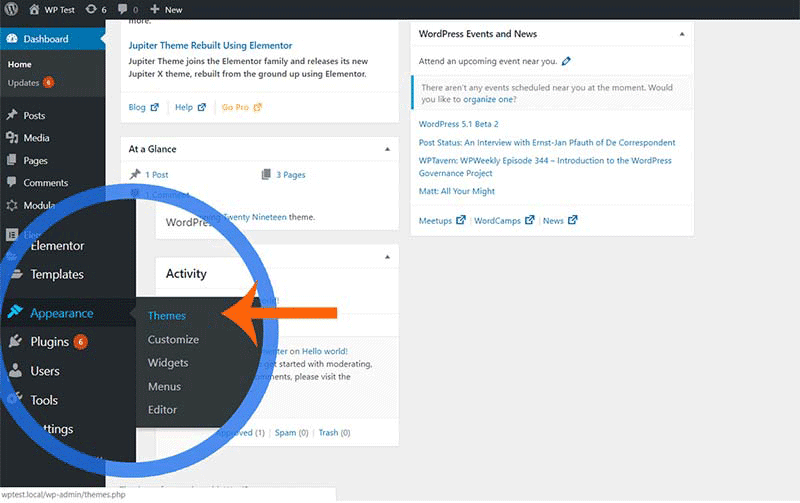
If you look at your browser's address bar, you will find that you have arrived at the URL - yoursite.com/wp-admin/themes.php. This page shows all the themes that are currently installed on your site. The active one will be right at the top.
Add Themes
Towards the right side of the title Themes, there is a button saying Add New. Click on it to arrive at the Add Themes page - yourdomain.com/wp-admin/theme-install.php.
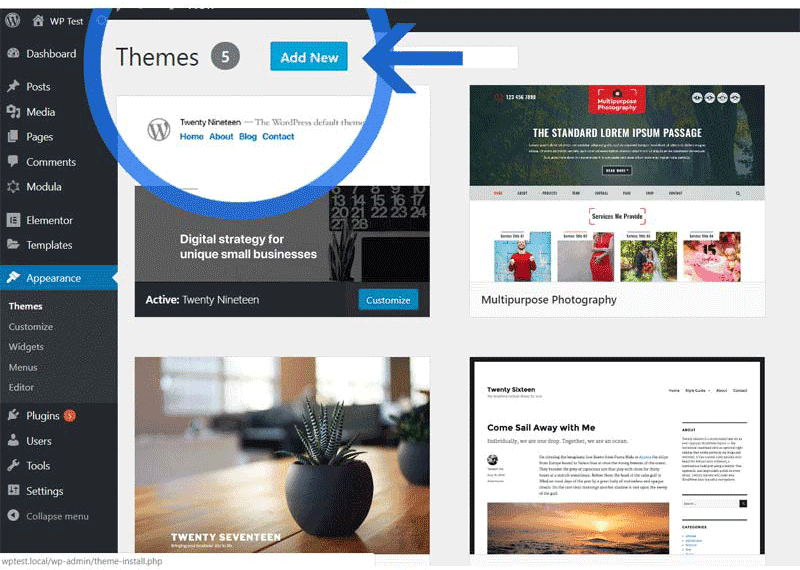
By default, this page shows the details of all the featured themes in the directory. You can also view the Popular, Latest, and Favorites categories also. However, the Feature Filter and Search box are the most useful if you want to find a particular theme from the directory.
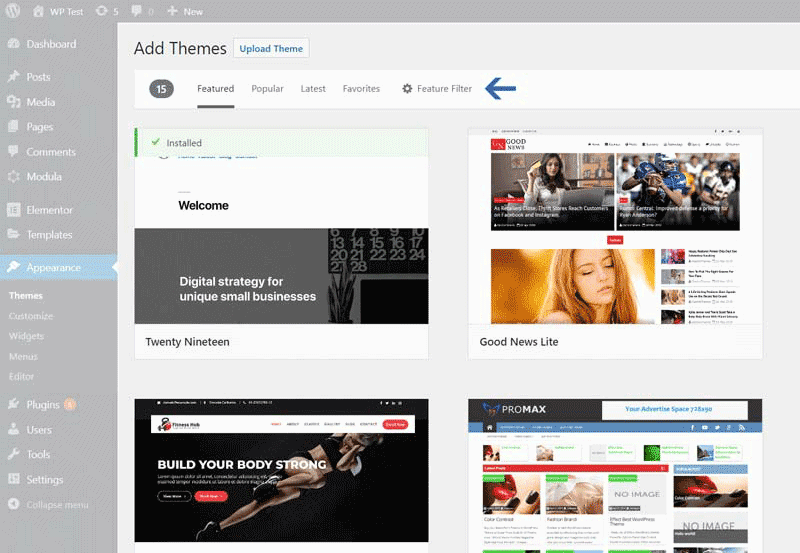
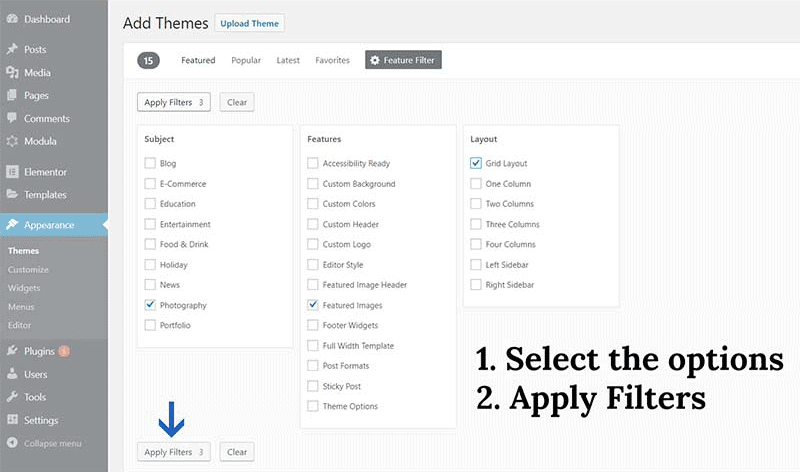
Example: Suppose you need a photography theme with a grid layout and featured images. Click on the Feature Filter button to open the list of options. You will see three columns - Subject, Features, and Layout. Check the required options from these columns and click Apply Filters. You get a list of themes, which match all the selected options.
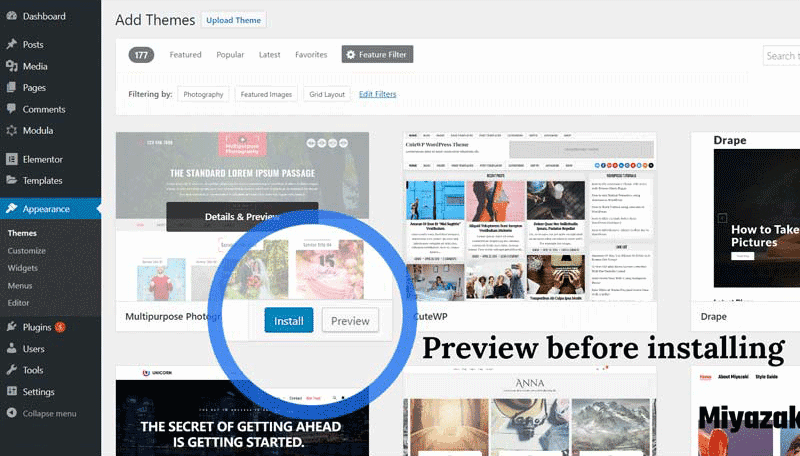
Hover over any theme image that you like. You can see two buttons - Install & Preview. Before installing, quickly check the Preview and ensure that you like the theme. After Previewing, close the dialog. Now click the Install button. After it completes, the buttons are now Activate & Live Preview (instead of the earlier Install & Preview).
Before clicking Activate, spare a few seconds for Live Previewing and ensure that everything is in place. Verify that nothing is broken. If OK, click Activate & Publish.
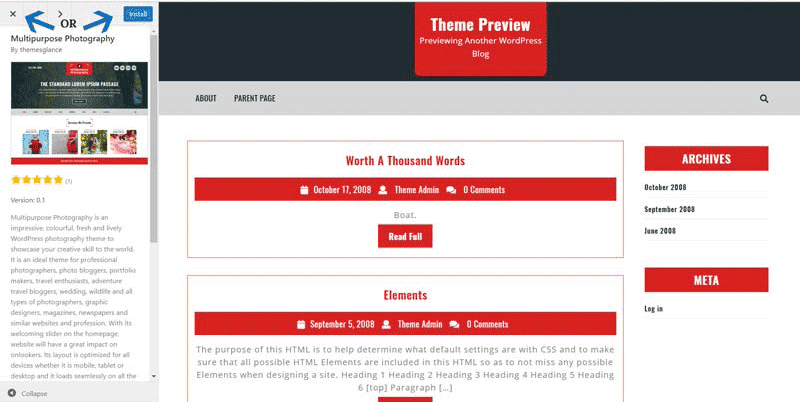
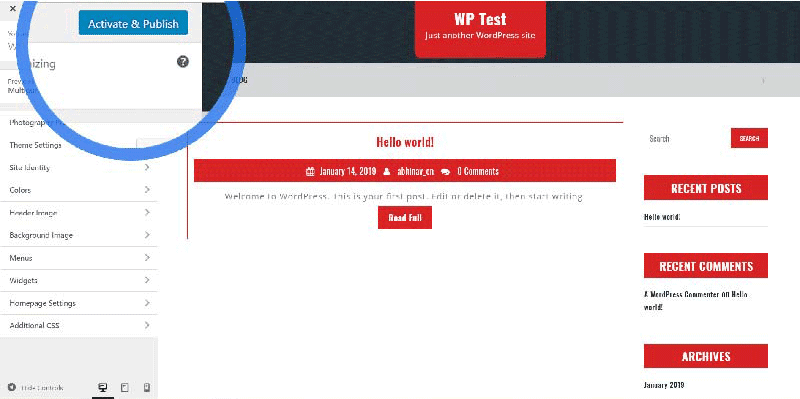
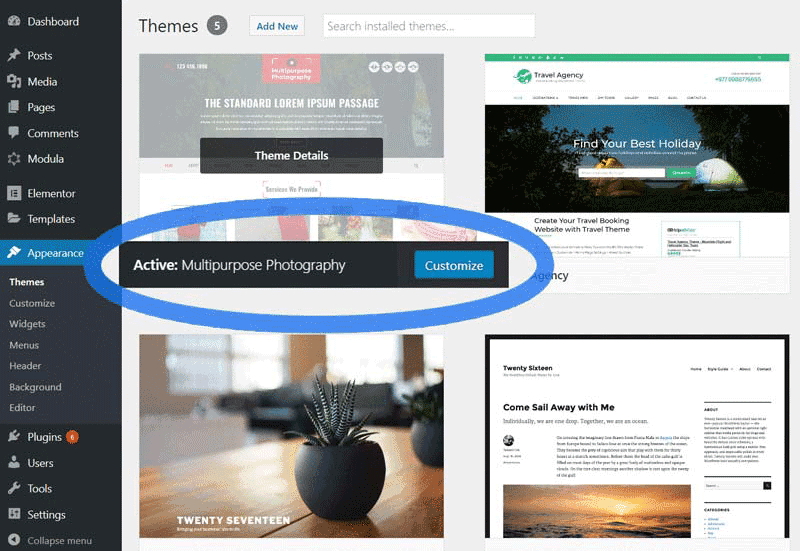
Here are the full steps in one image:
Installing Theme from a ZIP file
Now let us see how to install a theme from a .zip file. This is the preferred method whenever you want to install any premium theme you buy from the various theme marketplaces. For example, if you want to use Genesis from StudioPress, you cannot find it on the WordPress themes directory. To install such themes or child themes, the only way is to download it directly from the theme provider and install it.
Firstly, ensure that you have the zip file downloaded saved on your computer.
Then, log in to your dashboard and navigate to the Themes section. Click the Add New button on the top.
Now you should see the Add Themes page. Now click the Upload Theme button to open the file browser area. Click the choose file button and select the zip file from wherever you have saved it. Then click the Install Now button.

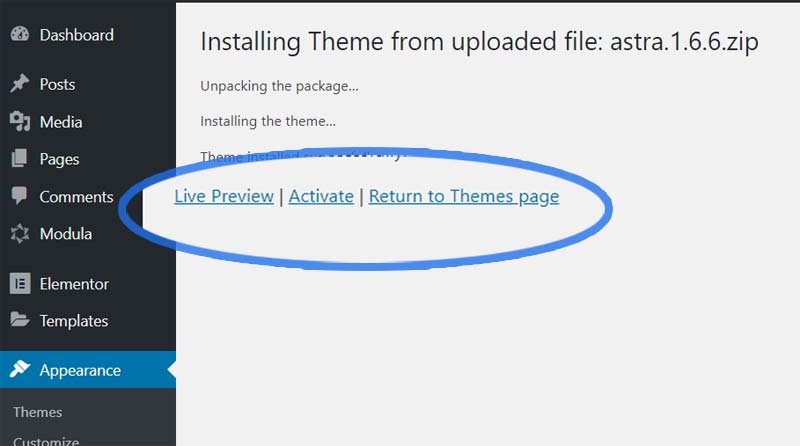
After installing, Live Preview it and Activate the theme.
Uploading to the themes folder via FTP
Finally, there is another way to upload a new theme. You can follow this if you are comfortable uploading files to the server via an FTP client like FileZilla. Otherwise, if you a beginner, you should not try this unless you are unable to upload a zip file using the above method.
For this, extract your theme folder out if the zip file.
Open the FileZilla program and connect to your server.
Navigate to wp-content/themes folder on your server. Now upload the theme folder to this location.
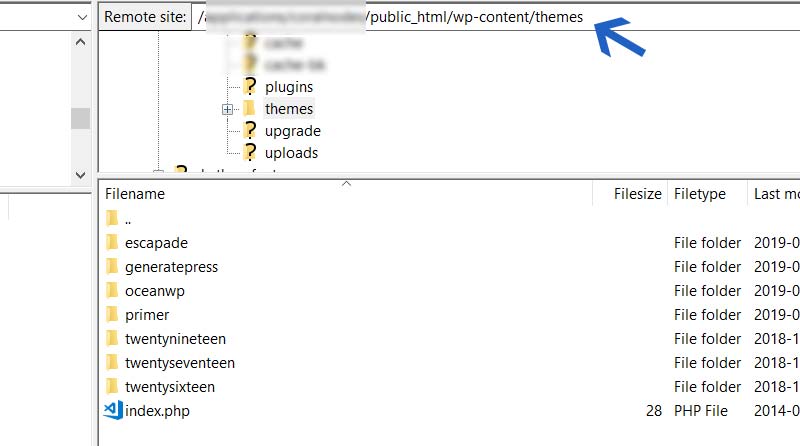
Once the upload completes, log in to your WordPress dashboard and go to the Themes page. There you will find the newly uploaded theme. and Activate it.
Conclusion
We have discussed the different methods to add a WordPress theme in the above sections. Before wrapping up this article, I want to mention one more thing - installing child themes. The process is almost the same. But instead of uploading and installing just one theme, you need to install both the parent and the child theme, then activate only the latter. The rest of the things are the same.


