This article may contain affiliate links. If you buy some products using those links, I may receive monetary benefits. See affiliate disclosure here
If you are not a designer, creating high-quality graphics for social media and blog posts can be a challenge. That's where tools with ready-made templates come helpful.
Earlier, I had published a review of Canva, one of the leading online graphic design tools available today. In this review, we will look at another one - Crello.
- You might also want to check: Top 9 Alternatives to Canva
At first, Crello may look quite similar to Canva. But on closer inspection, we can see that there are a few differences. In this article, we will take a detailed look at the features, pricing, and usefulness of Crello.
Top Features to Consider Crello
These are some of the top features that makes designing with Crello quite simple.
-
Ready-made templates
-
Free, premium, and stock photo library
-
Videos, Music, and Animations
-
Manage designs with your team
-
Upload custom fonts
-
Icons library
-
File uploads
Although the premium version allows setting up teams, one thing I found missing is the brand kit. So there is no way to save your brand properties like color palettes.
Update: Crello now support Brand Kits.
How to Get Started with Crello
Signing up with Crello with your email address is a straightforward process. Since they offer a 14-day free trial, you can try the software before paying. However, to start the trial, you have to provide your payment method, either credit card or PayPal.
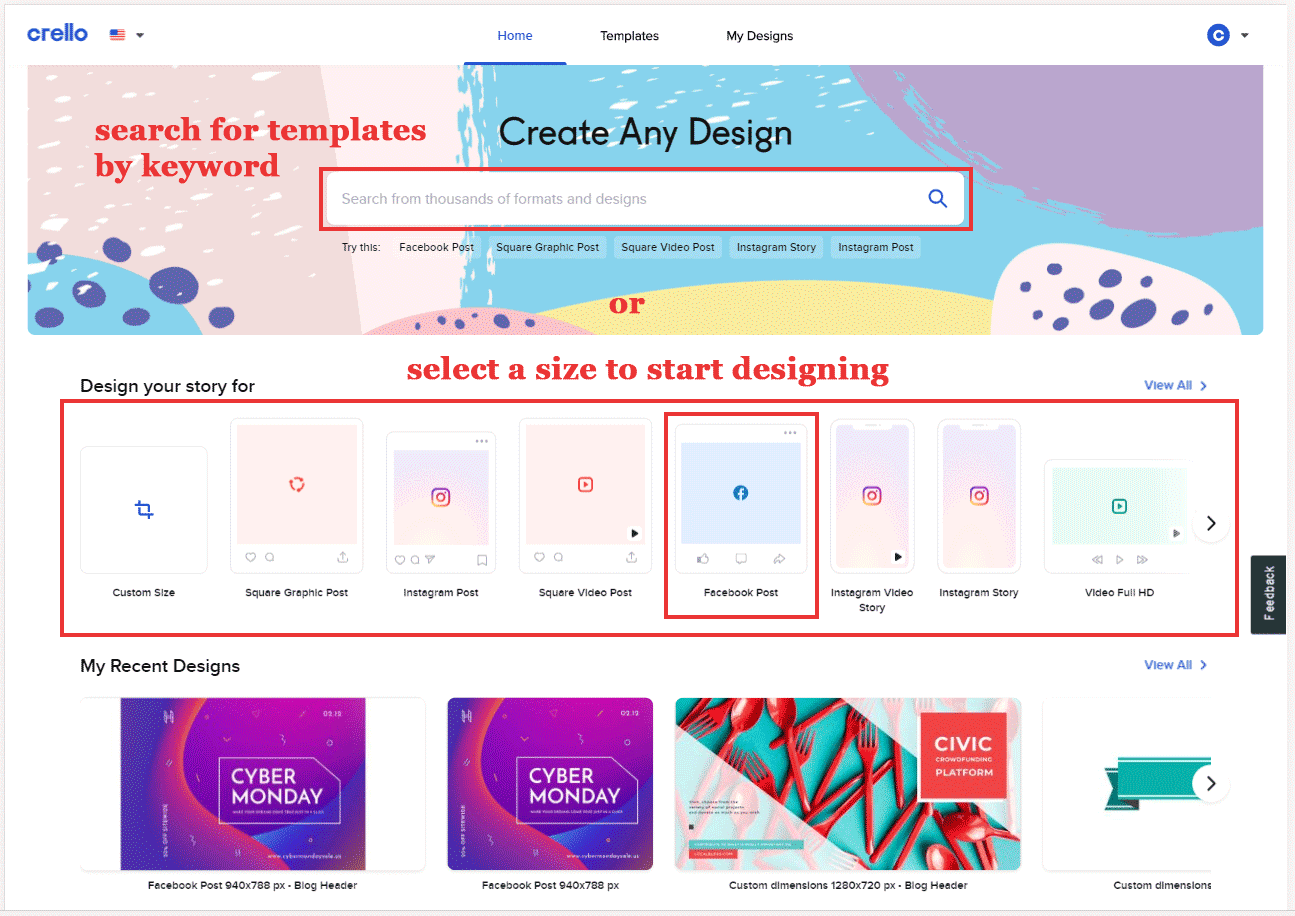
After logging in, you will reach the Home page, where you can start with a blank canvas or search for a pre-built template. There are different sizes available for different purposes like Facebook posts, Instagram Stories, YouTube Channel Art, Blog Header, etc.
Here I am going to select the Facebook Post size, which will open up the design canvas.
The Design Interface
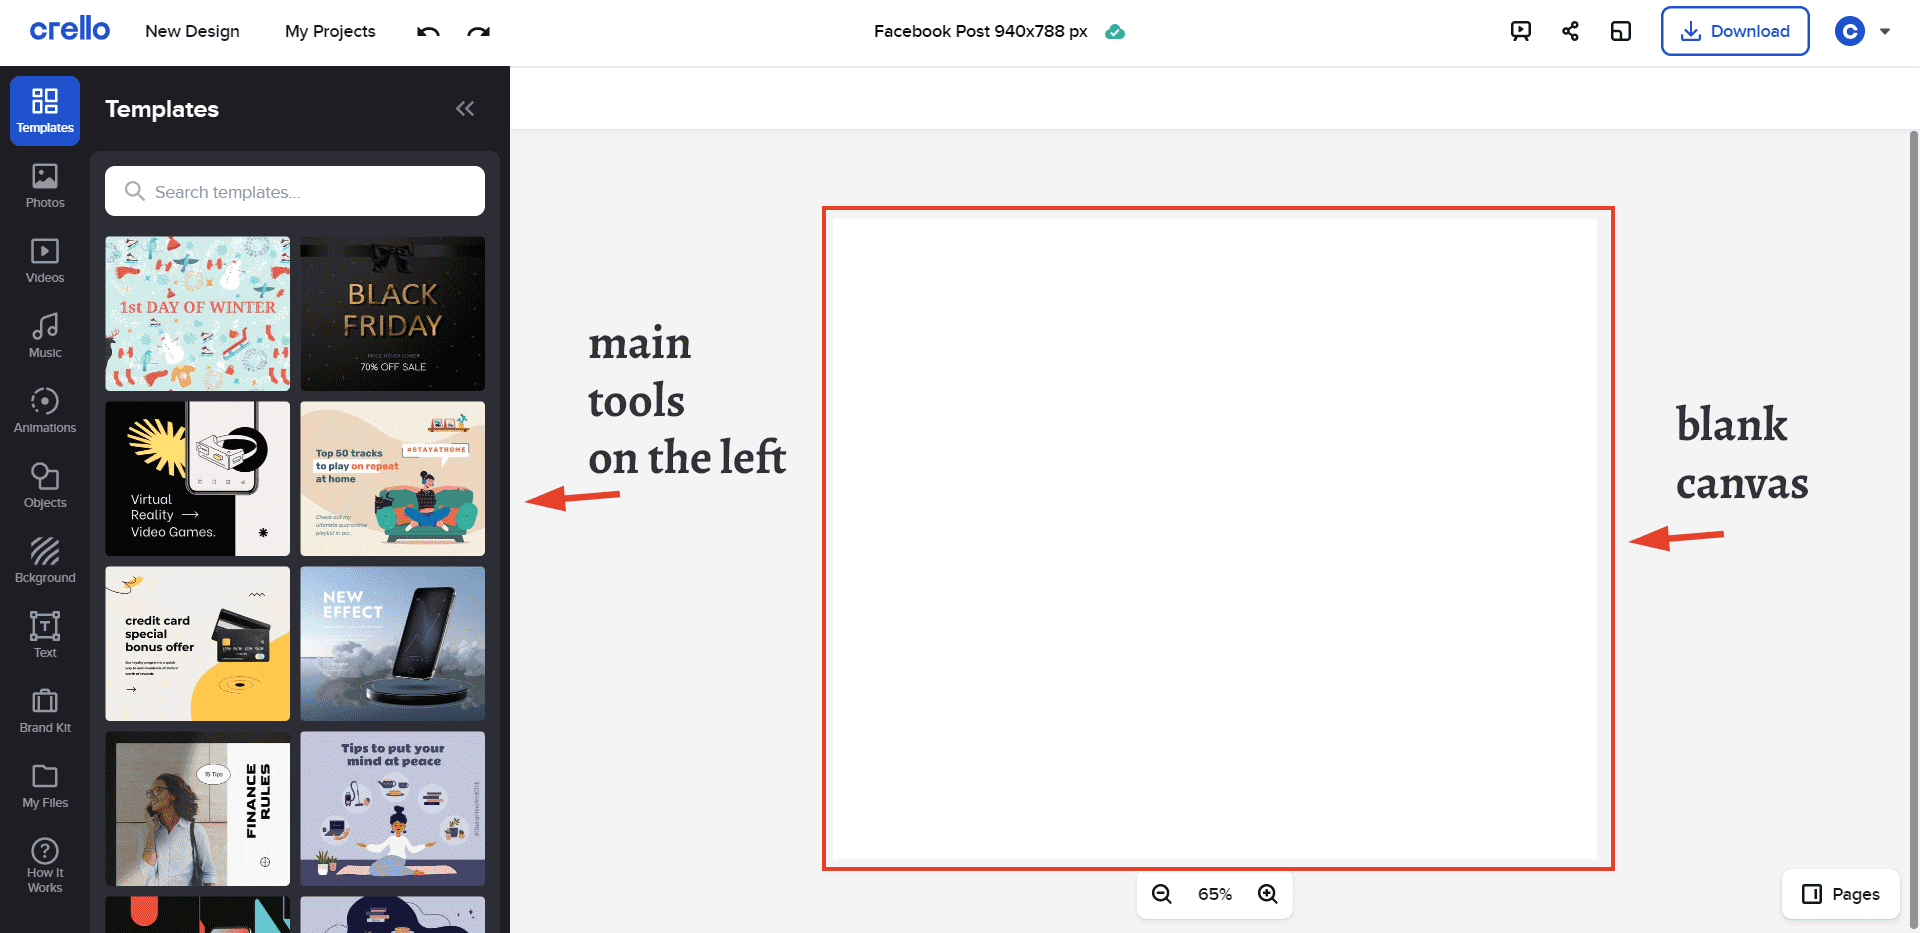
Crello editor opened with a blank canvas
On the left side, you can see the main menu, which includes the following main items:
- Templates
- Photos
- Videos
- Music
- Animations
- Objects
- Background
- Text
- Brand Kit
- My Files
Templates: Basic Usage
To quickly show you how to use this interface, I will make a graphic for the topic 'best Woocommerce themes for 2020'. So, the next step is to search for any related templates.
Click on the Templates button on the top left, and then search for the word 'eCommerce', which shows the relevant results, including both free and premium ones. Since I am within the trial period, I have access to the premium templates too. But for now, I am selecting one of the free templates.
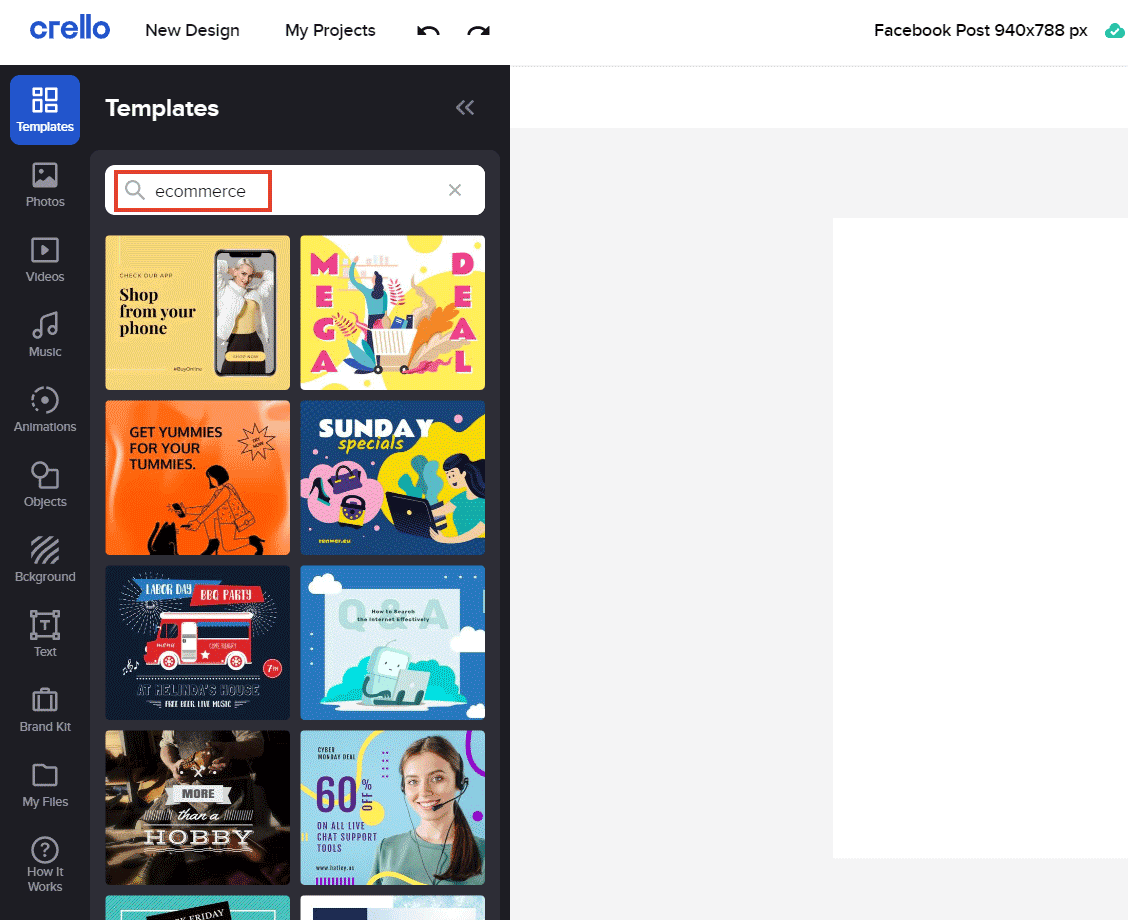
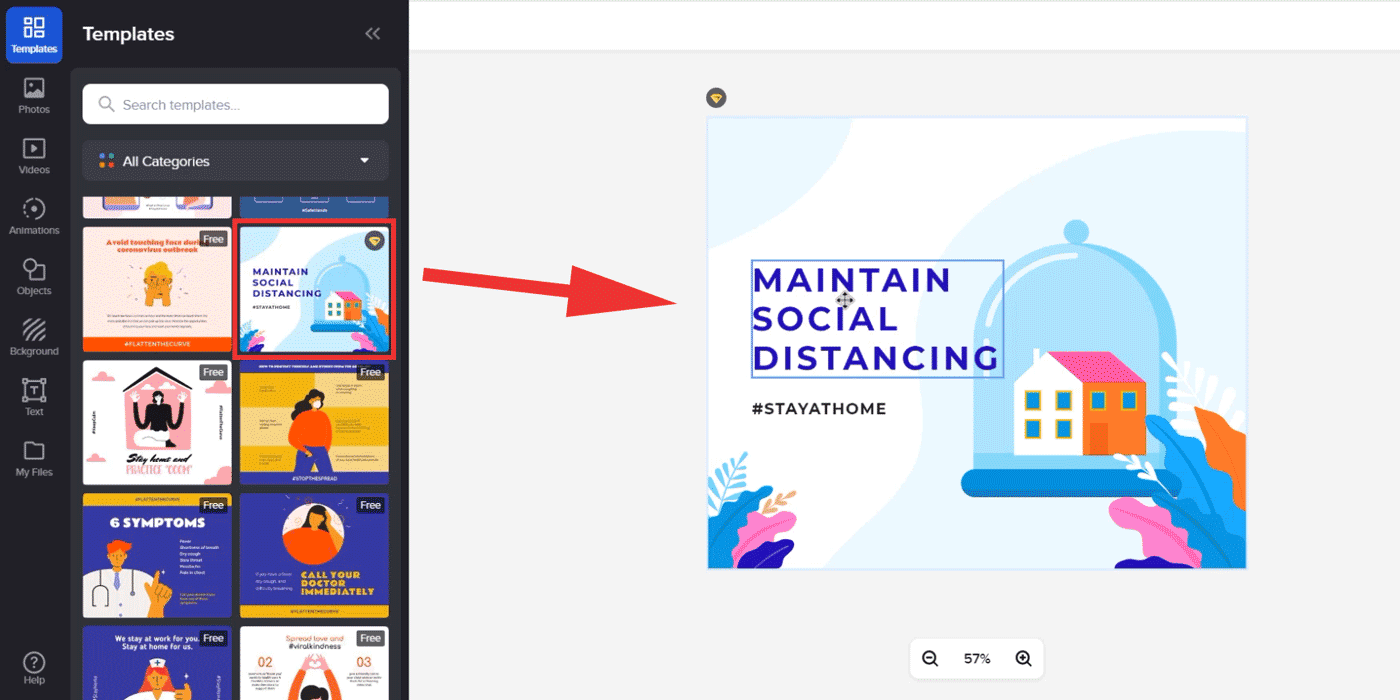
Click on a template, which will load it on the canvas on the right.
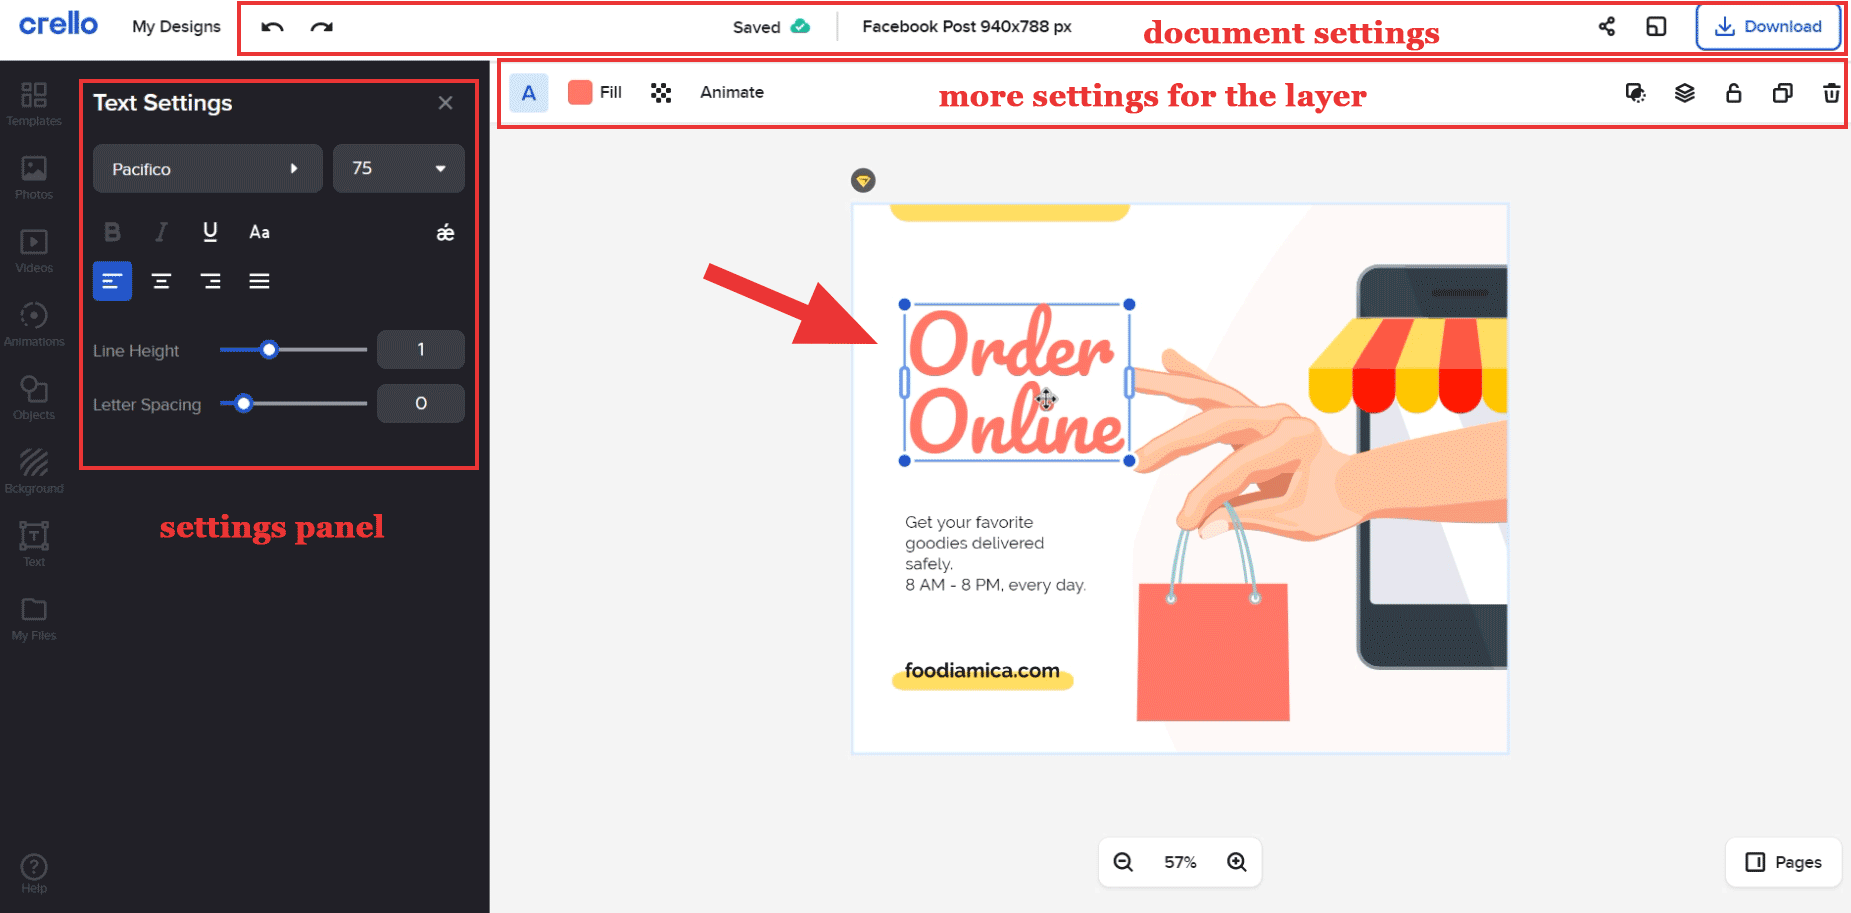
Next, we have to modify it to suit our needs. For example, I want to change the title. To do it, click on the text element, which will open the settings panel for that specific element on the left. Also, on the top, you can see more options for that layer, like color, opacity, layers, animation, etc.
Likewise, you can customize any element to make the template fit your needs.
Using Objects
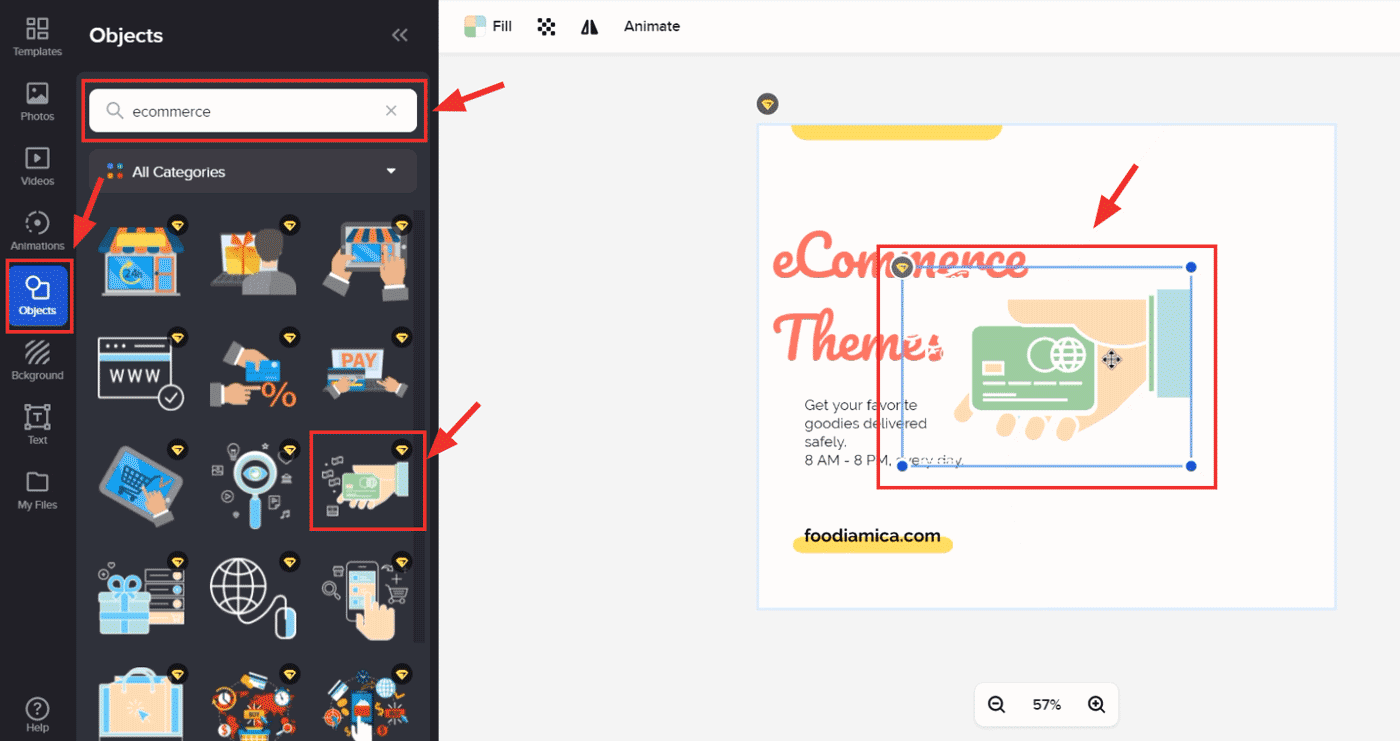
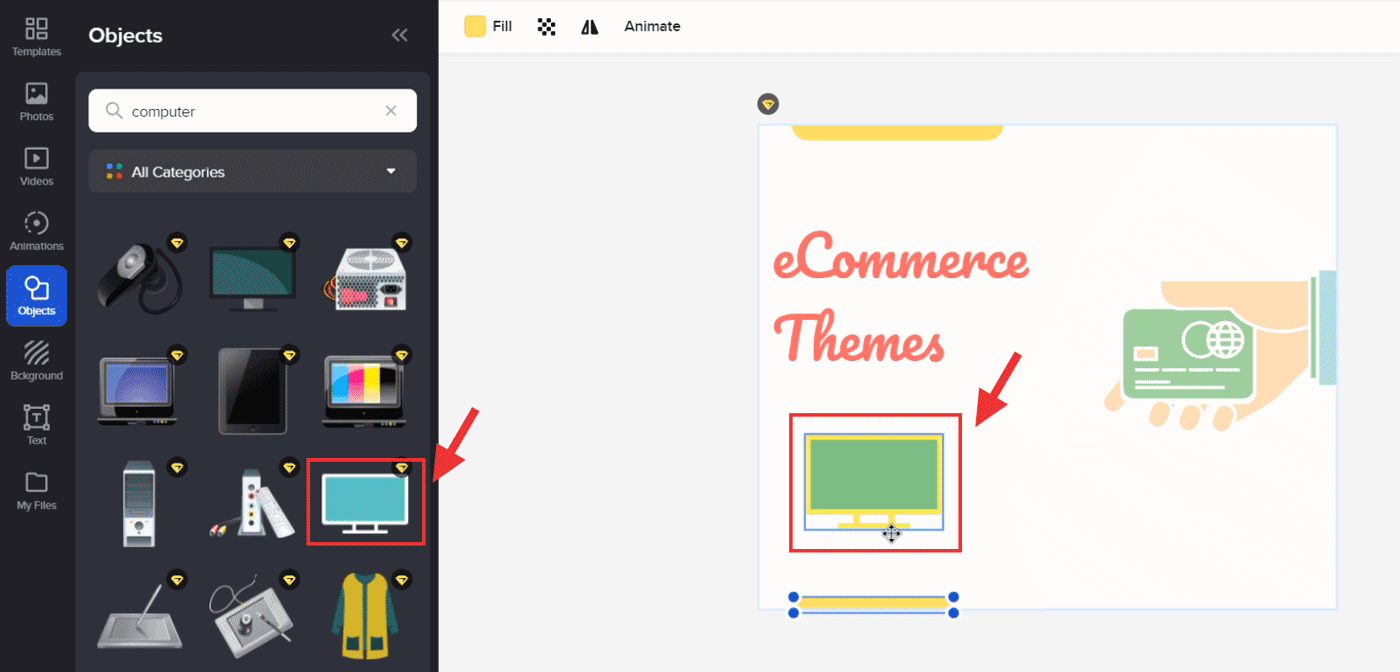
Not only editing the existing elements, you can also add or remove elements from a template. Suppose I want a different graphic on the right side.
- Delete the unwanted element(s)
- Go to the Objects tab, and search for by keyword/category
- Click on the graphic you want to insert, then drag it to reposition
Let me add one more icon, a computer screen.
Here is the final design:
My design may not be that great, but I hope it could give you a basic idea about what you can achieve with Crello.
Crello has a nice collection of templates. However, sometimes you may not be able to find the right template for a specific keyword. In such a case, what I would do is, pick some suitable template from the whole library based on its layout and color combination. Then change the text and objects to match my need.
Here I select a random template from the library, which has no connection with the topic 'eCommerce'.
After a few tweaks, here is the final output. In fact, it looks better than my first design.
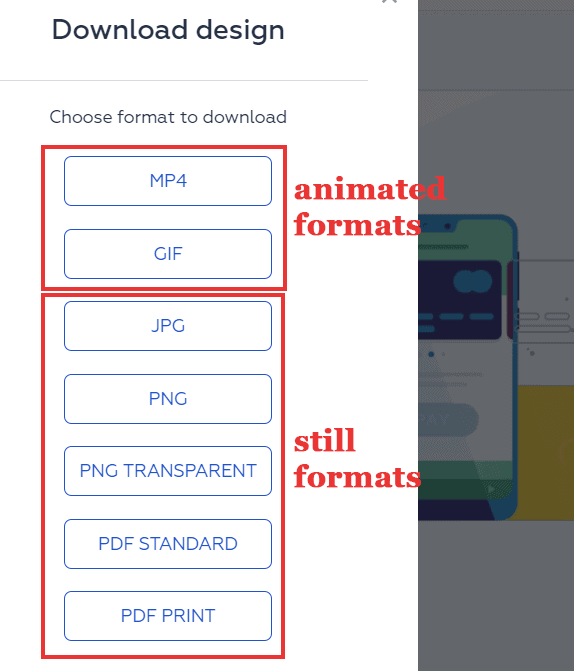
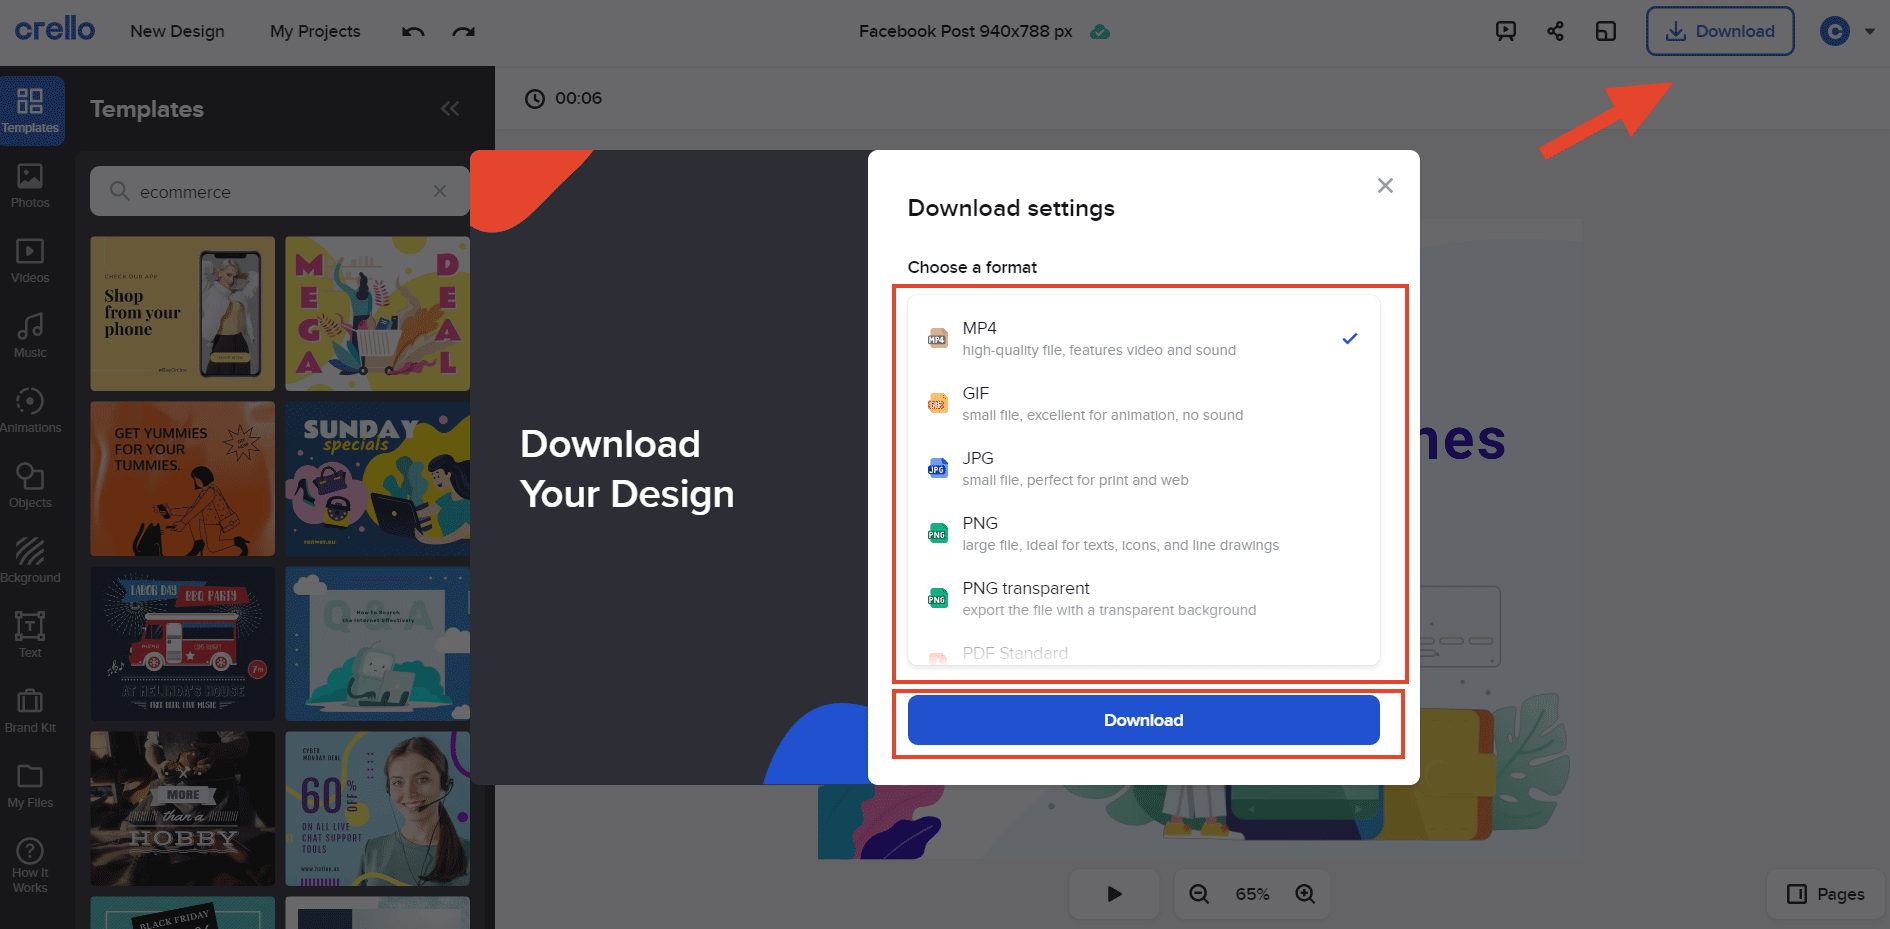
Once you finish the editing, click on the 'Download' button on the top right corner, which will open a lightbox. From there, select an appropriate file format to export the design to your computer.
Performance
Upon inspecting the HTML source, I have found that Crello's user interface is made using the Javascript React Framework. That doesn't make it faster or slower.
However, I felt a few bugs here and there. For example, the text gets clipped off while changing the dimension of the layer/element. Also, the editor is sluggish while dragging elements inside the canvas.
Apart from these minor problems, I haven't found any major issues so far.
Update: it looks like the bugs have been fixed.
That's the basics of using templates & objects to create a design. Next, we can take a look at the other features.
More Features
Photos Library
Like the objects you have seen above, you can also search for photos in Crello. For that, go to the Photos section, where you will find three tabs:
- Premium: Available for all users.
- Depositphotos: The photos are of better quality but you have to purchase them separately.
Overall, Crello has a great collection of photos.
For example, I searched for the word 'server', I mean the computer server you see in a web hosting company. These were the results:
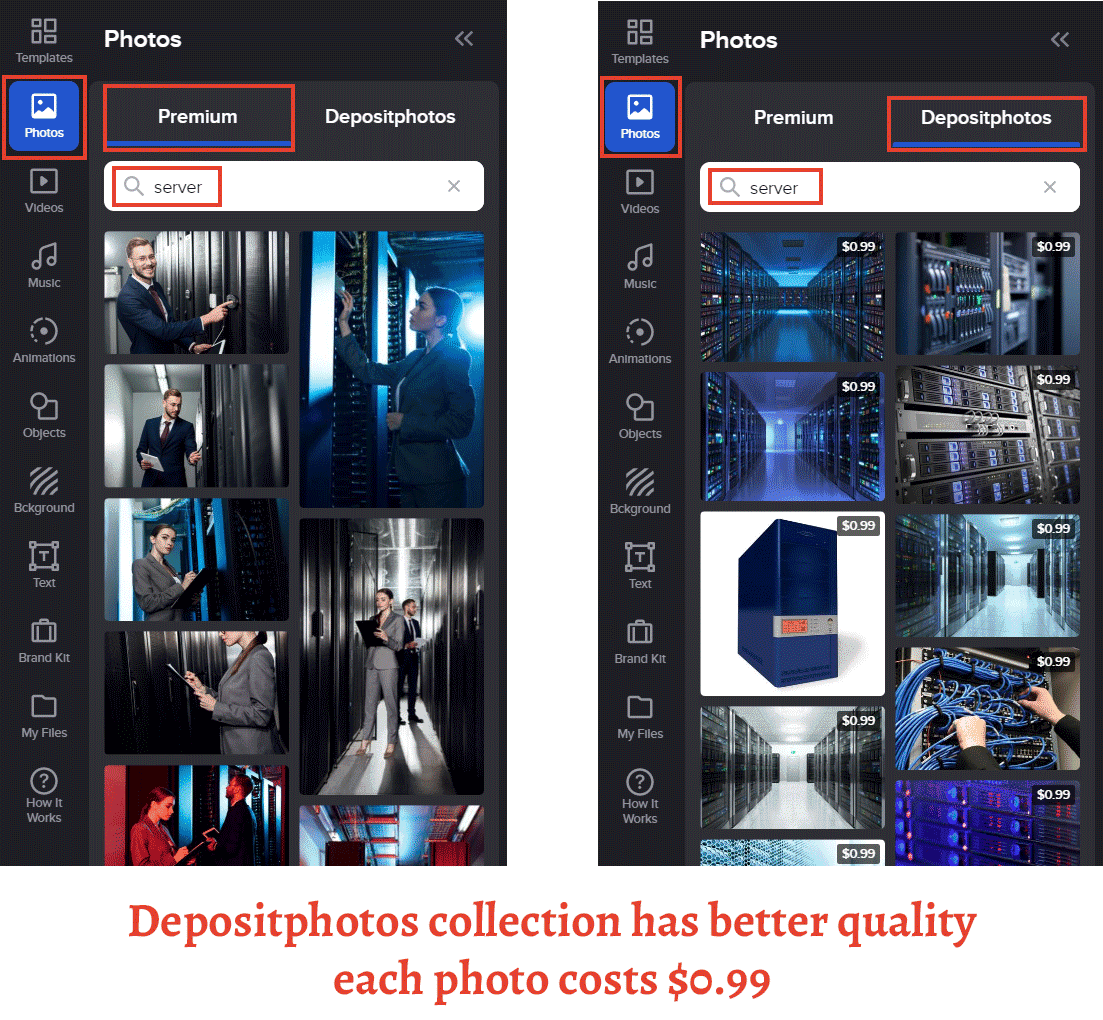
As expected, the quality and relevance were highest with the Depositphotos collection, while Premium ones were OK. Here, note that albeit the name 'Premium', all photos in the Premium category are available in the free plan too. As I am writing this, that is how the pricing is.
Videos
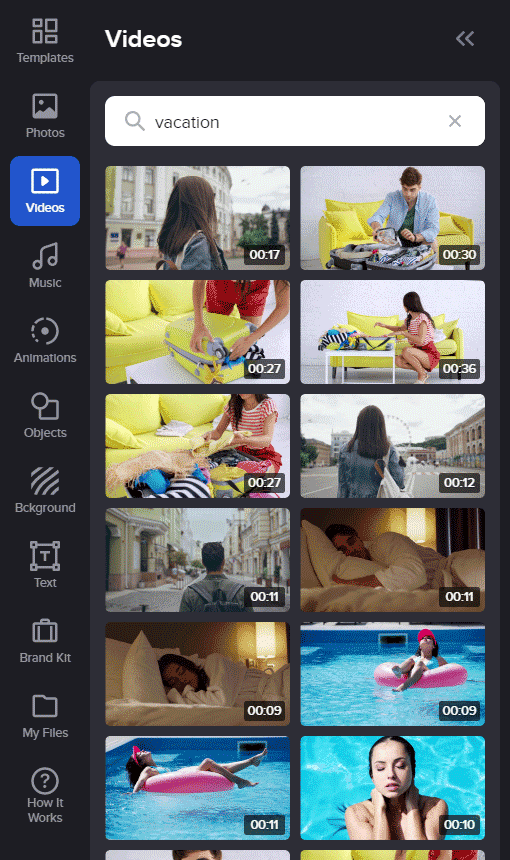
Next is Videos. Just like Photos, you can search by keywords.
Here are the results when I searched for the keyword - vacation.
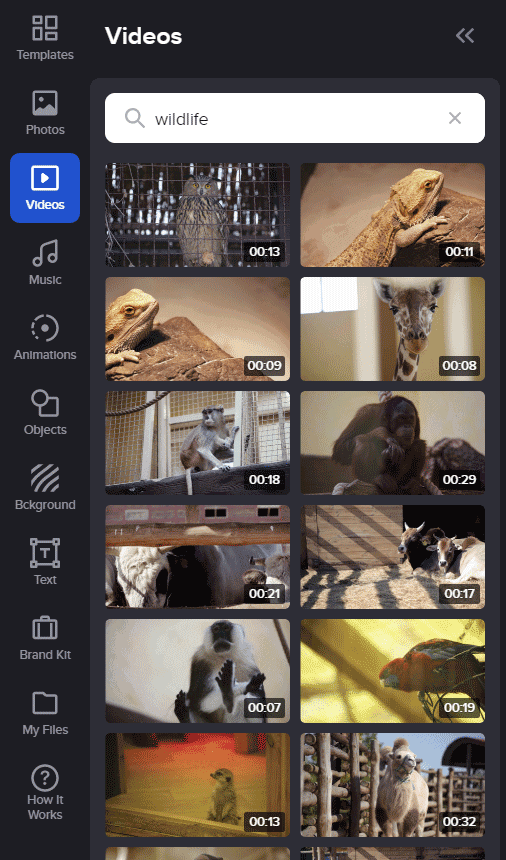
And here is what Crello returned when I search for 'wildlife'.
c
Overall, I feel that the quality and relevance are not that great if you compare them with other stock video sites. But considering the price, it is not that bad either.
Once you have found a relevant video, click on it and it will download it into the editor. Later, you can export it as an MP4 or GIF file. It's quite useful to create video ads and posts.
Animations
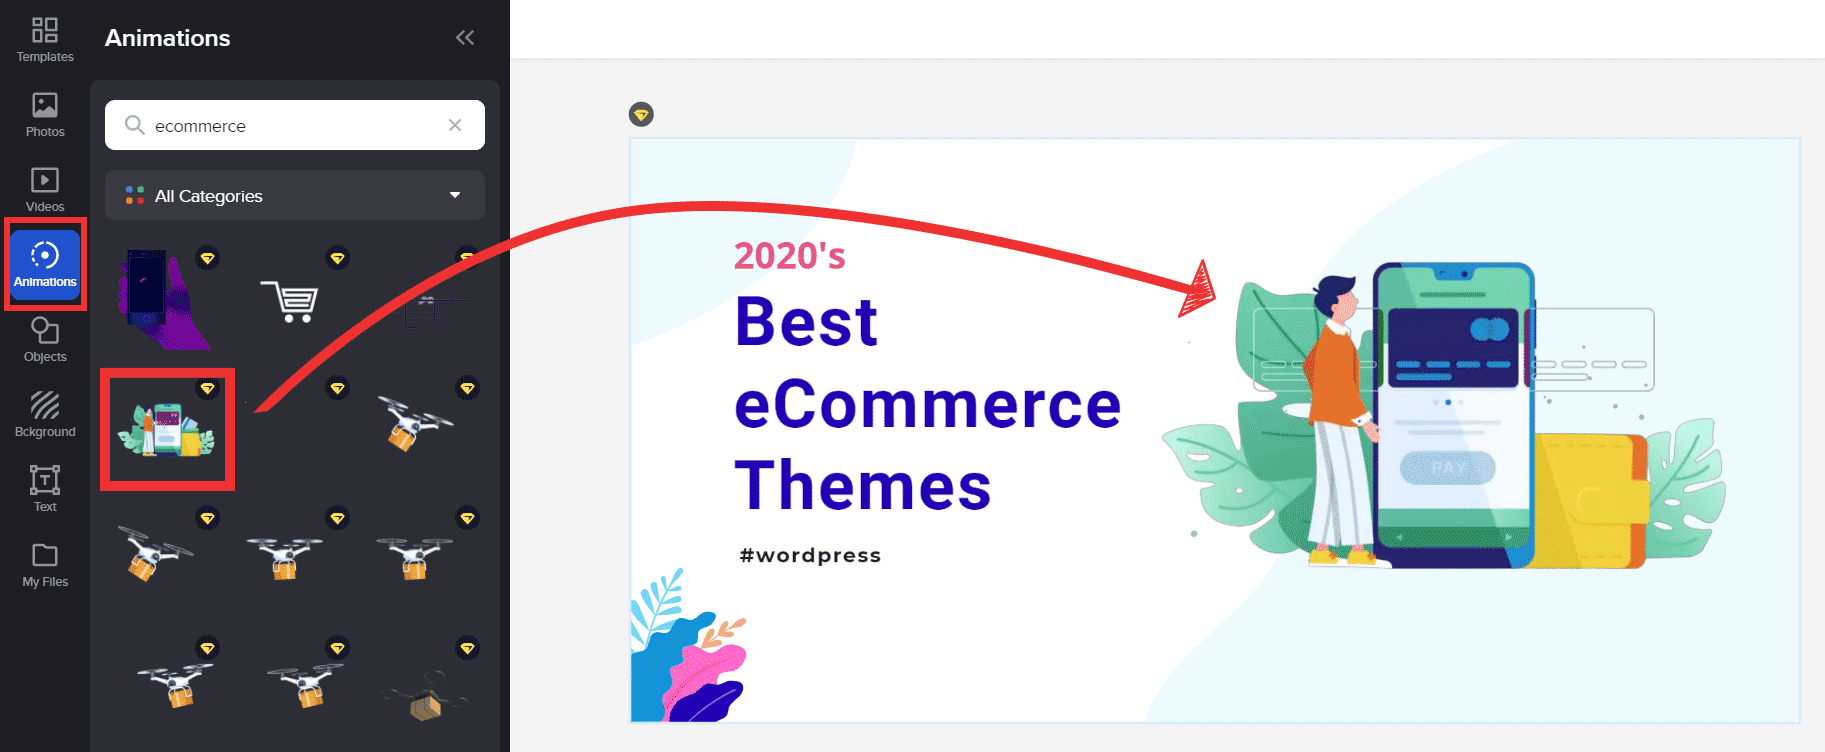
Under the Animations section, you can find short gif-like animations. These are great to make your designs feel dynamic. Unlike the Videos and Objects collection, the Animations collections have better quality. For example, here I replaced the above picture with this animation.
It looks better than the previous two versions.
When using animations inside your canvas, you should export them as GIF or MP4 to keep it dynamic. However, you can also save it as normal JPEG or PNG as well, which gets saved as a still image.
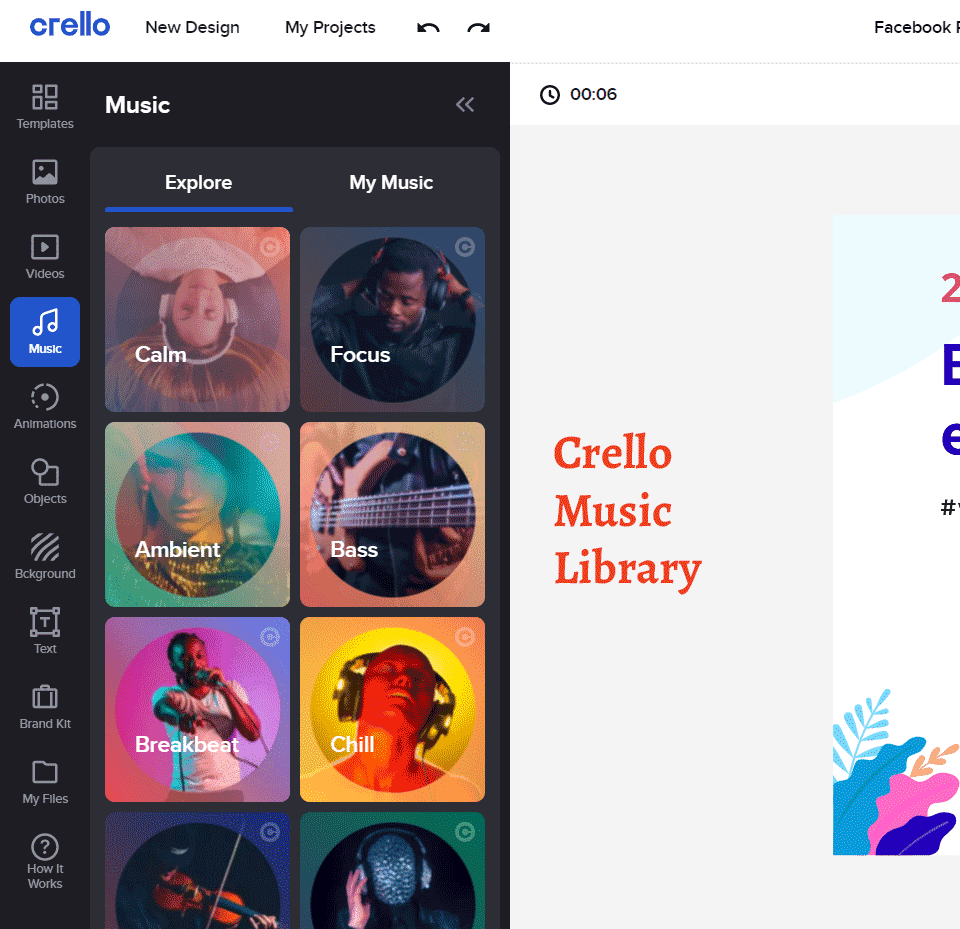
Music
Apart from videos, music is another crucial element when you want to create short videos, especially for ads and promotions. Crello offers that too.
You can search for different genres of music:
- Calm
- Focus
- Ambient
- Chill
- ...and many more
Most of the tracks are 30s long, making them ideal for short video background music.
Backgrounds
Crello supports three types of backgrounds:
- Photos
- Videos
- Colors
When you set a background, it sets as the bottom layer, which becomes visible through the transparent areas in your design.
You can also adjust the transparency to make it blend with the foreground elements.
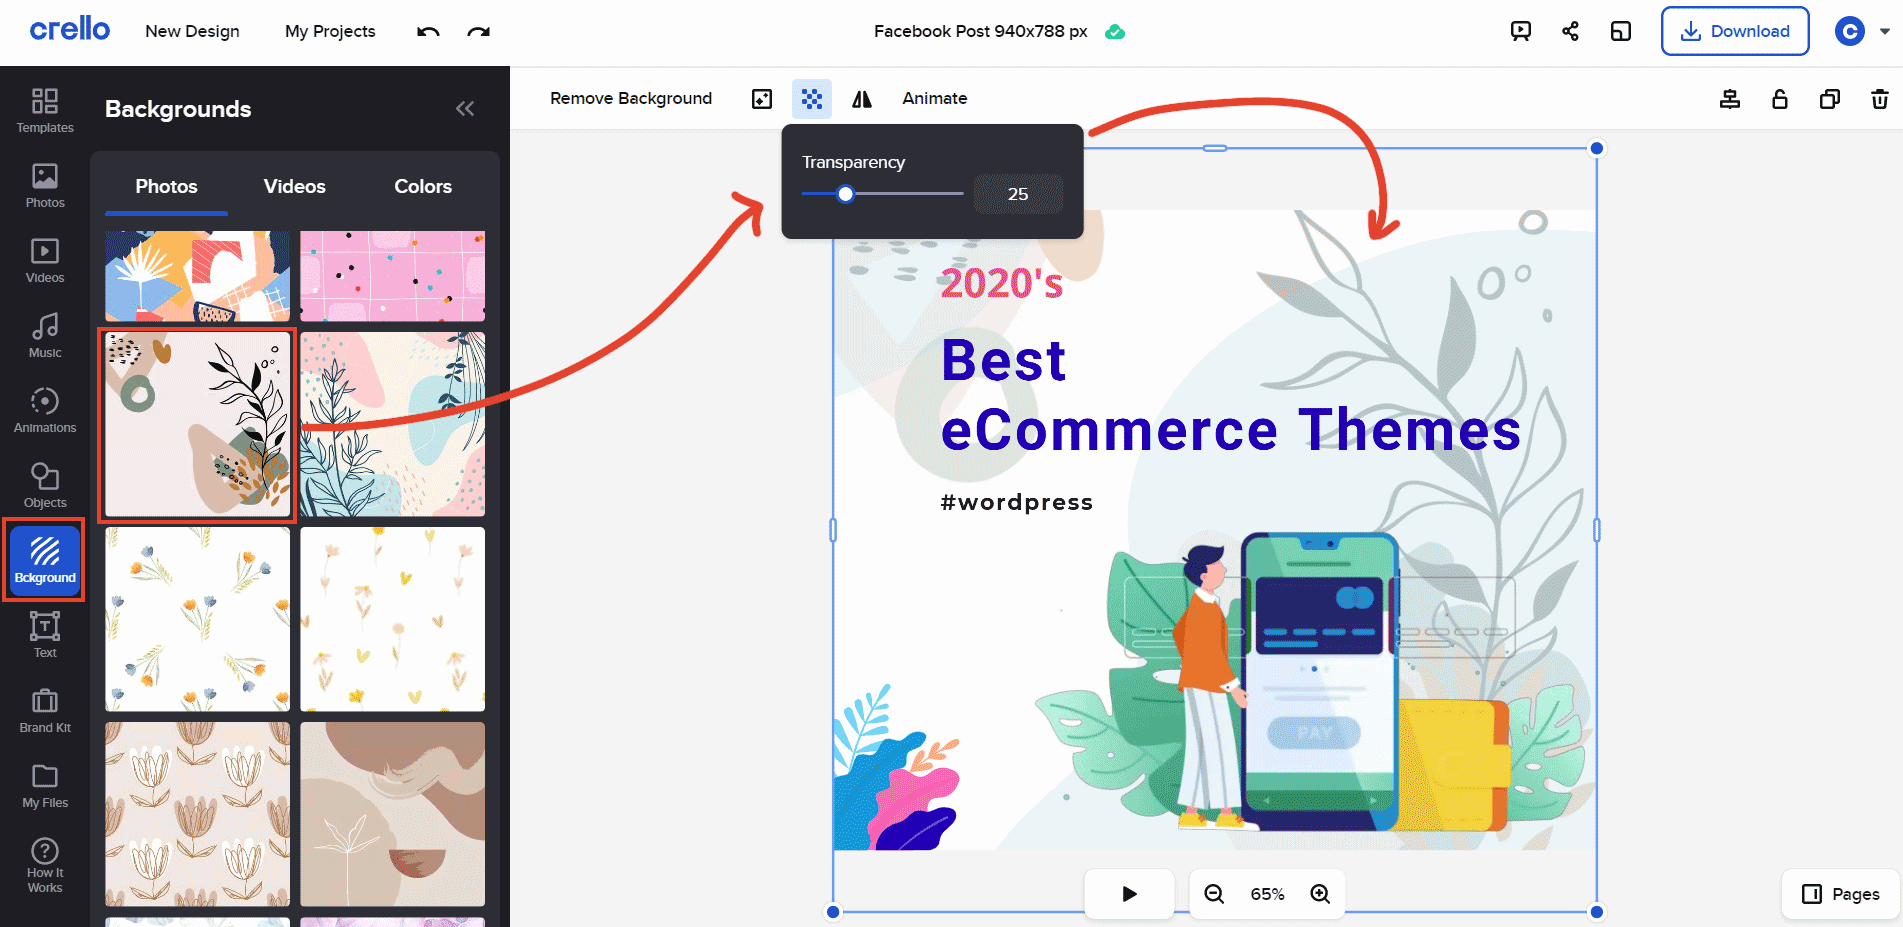
setting background photo with transparency
Out of the three types of patterns, the Photos section mostly contains static illustrations while Videos contain dynamic gif-like patterns. And in the Colors tab, you can set solid colors, or select one from your brand color palette.
Text & Fonts
For texts, you can set the usual things, like font family, size, alignment, etc. In addition to these, Crello also offers a few text styles. Masked Text is one of them that I quite liked. It allows setting a photo or a video as the text's fill, instead of a solid color.
You can select the mask image from Photos, Videos, or Colors. In the below design, I have added a moving background to the main text.
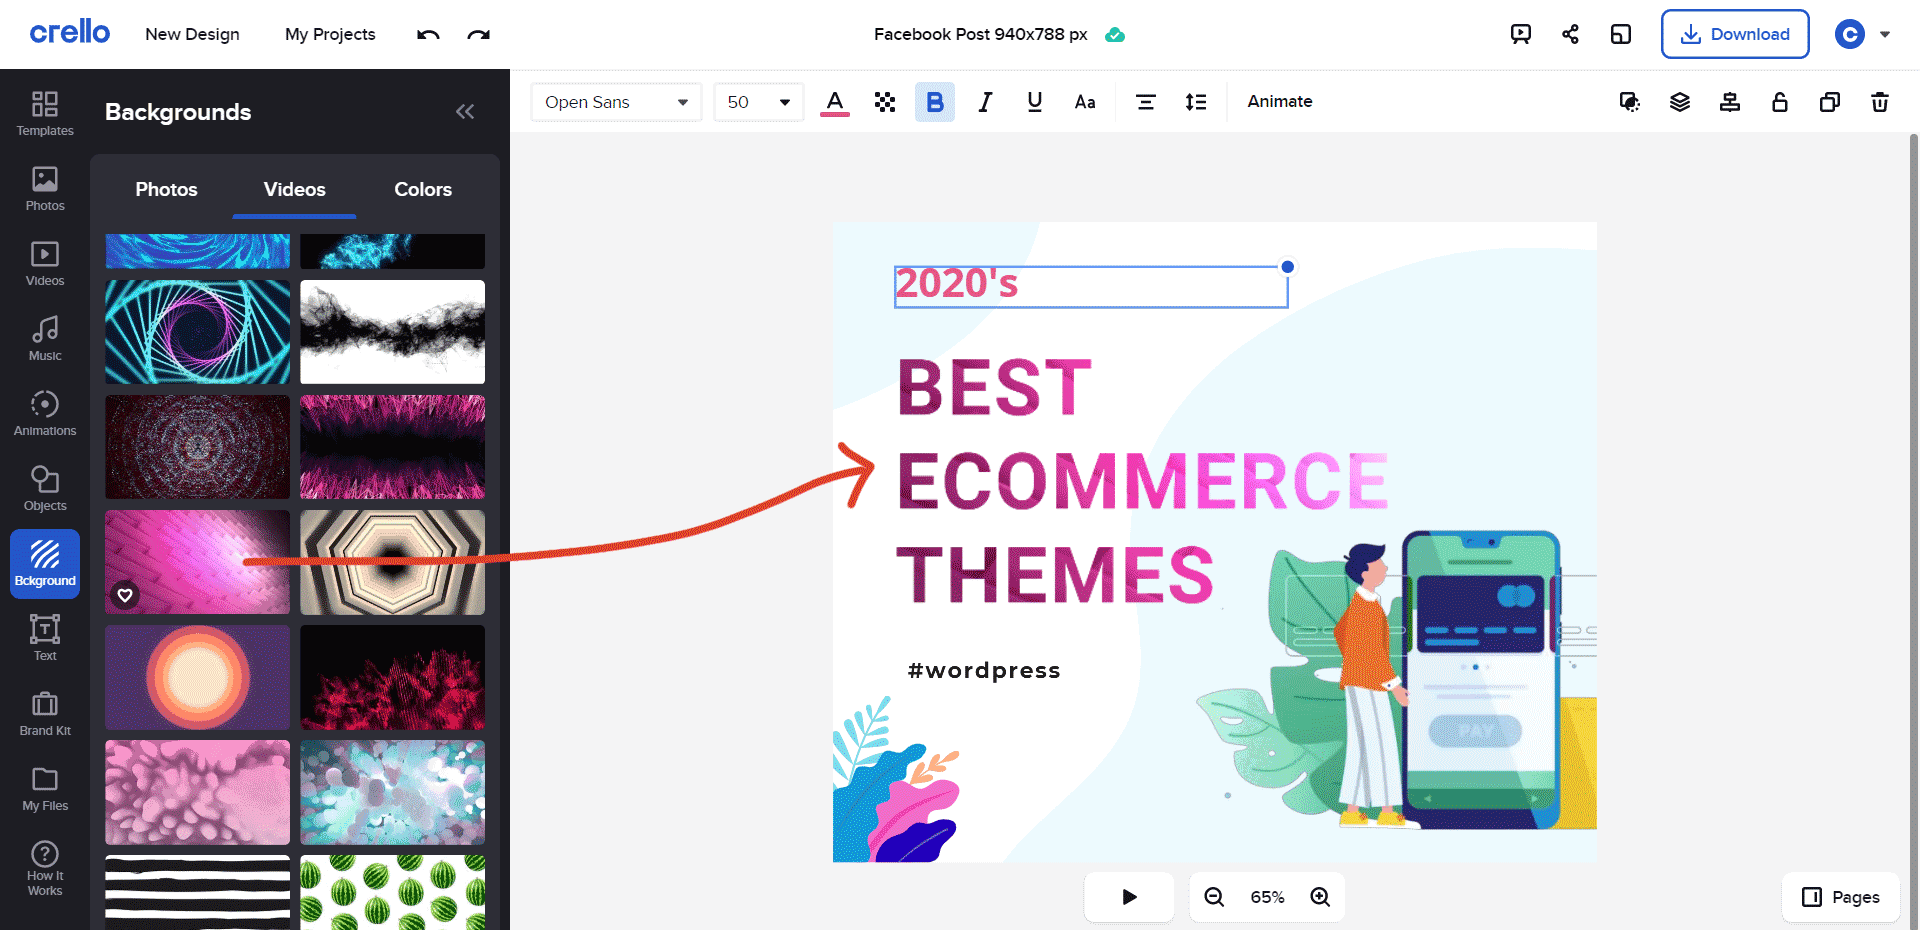

here is the final design exported as gif - not bad, right?
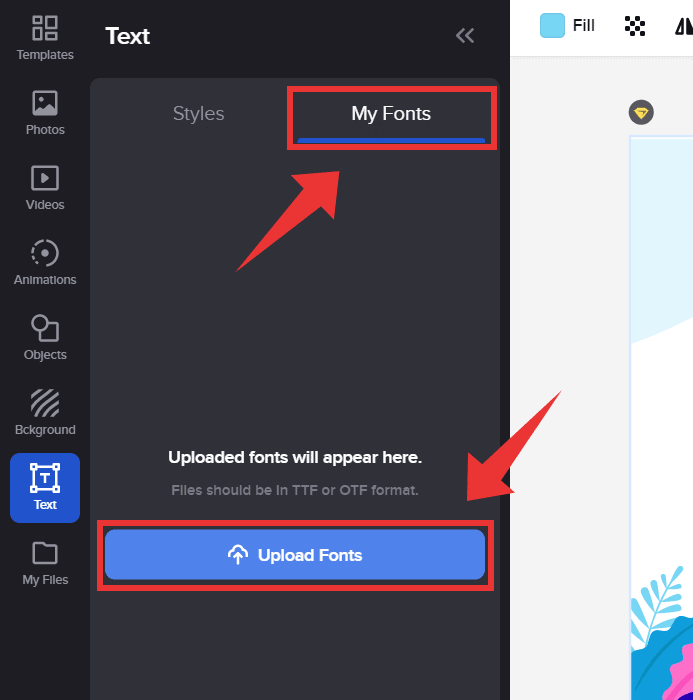
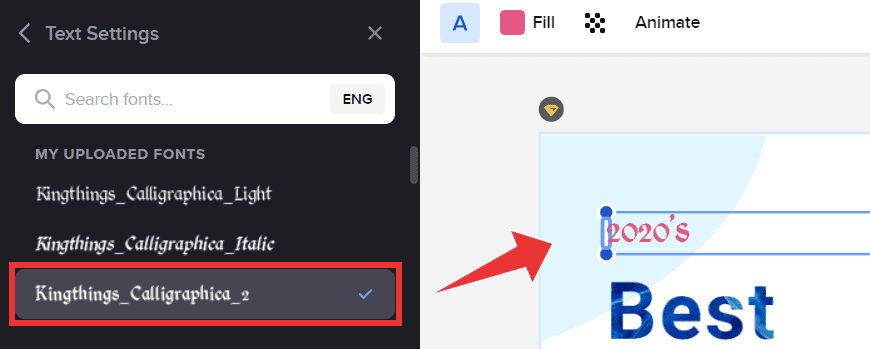
Except a few, most of the fonts are free fonts from the Google Fonts library. If you want to use a premium or custom font, you can do that too. Crello allows uploading custom font files in TTF or OTF formats.
To do that, got the My Fonts tab and click the Upload Fonts button to upload your font files. Here I am going to upload a font file I have downloaded from FontSquirrel:
- My Fonts > Upload Fonts
upload font files
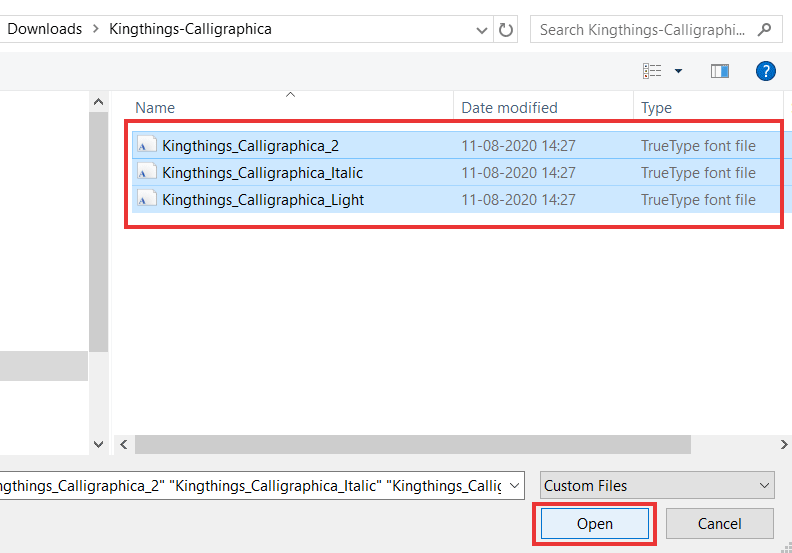
select ttf or otf files
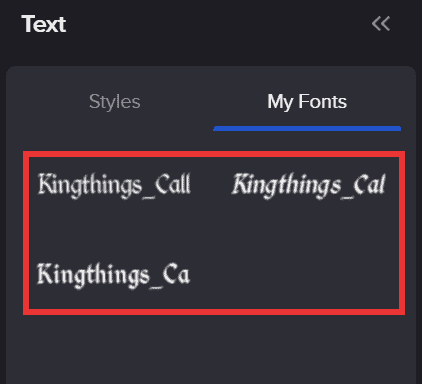
After that, it will be available for selection when you click on any text element:
custom fonts appear funder My Fonts
setting custom font for text element in Crello
Brand Kit
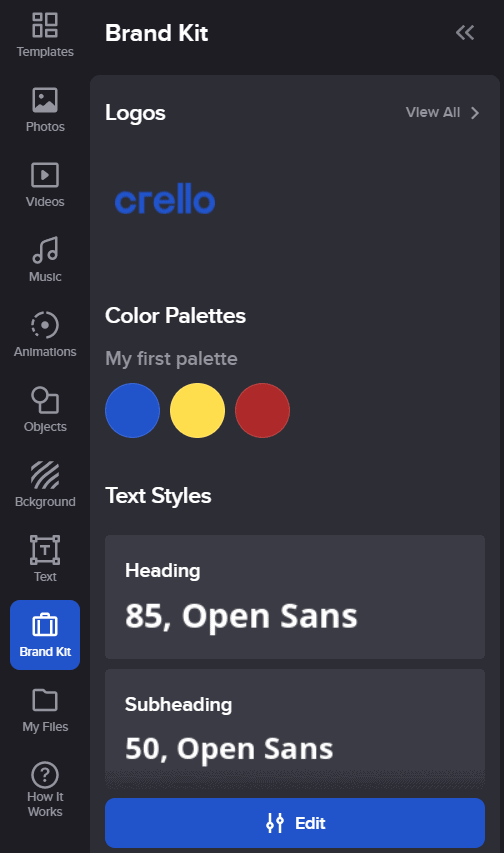
Brand Kit is a pro feature. The free plan allows only editing the existing color palette, which contains three colors. Other than that, two upload logo and to set fonts, upgrade is required.
File Uploads
Like custom fonts, you can also import your images and videos into Crello.
- Image files should be in PNG, JPEG, or JPG formats - max. files size is 50MB
- Video files should be in MP4 or MOV formats - max files size is 200MB
Go to the My Files section and click on the Upload Image or Video button to upload your files.
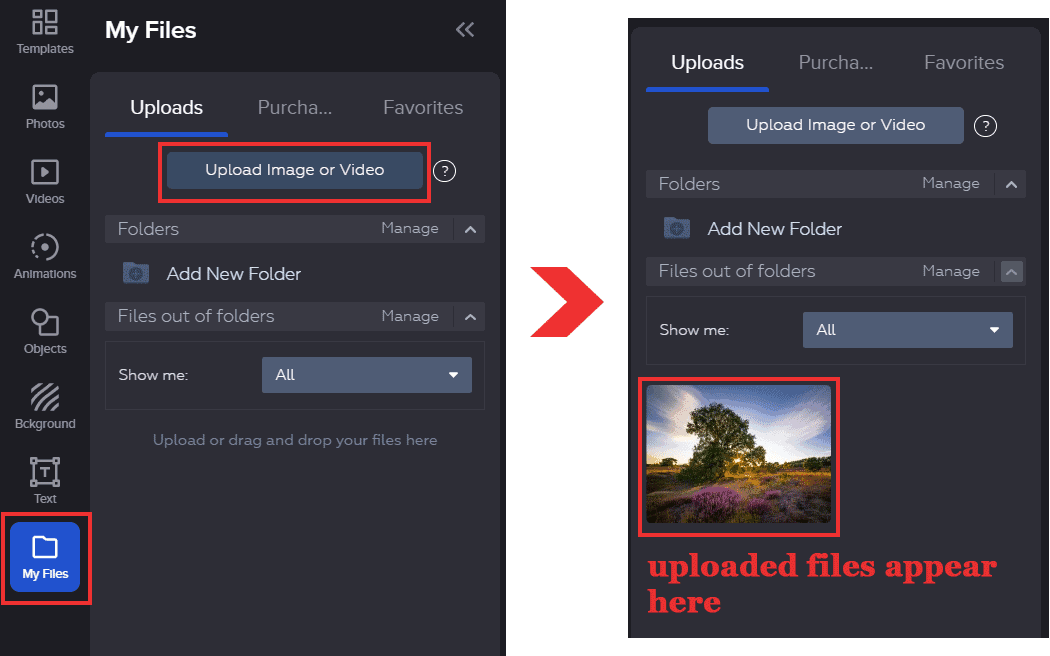
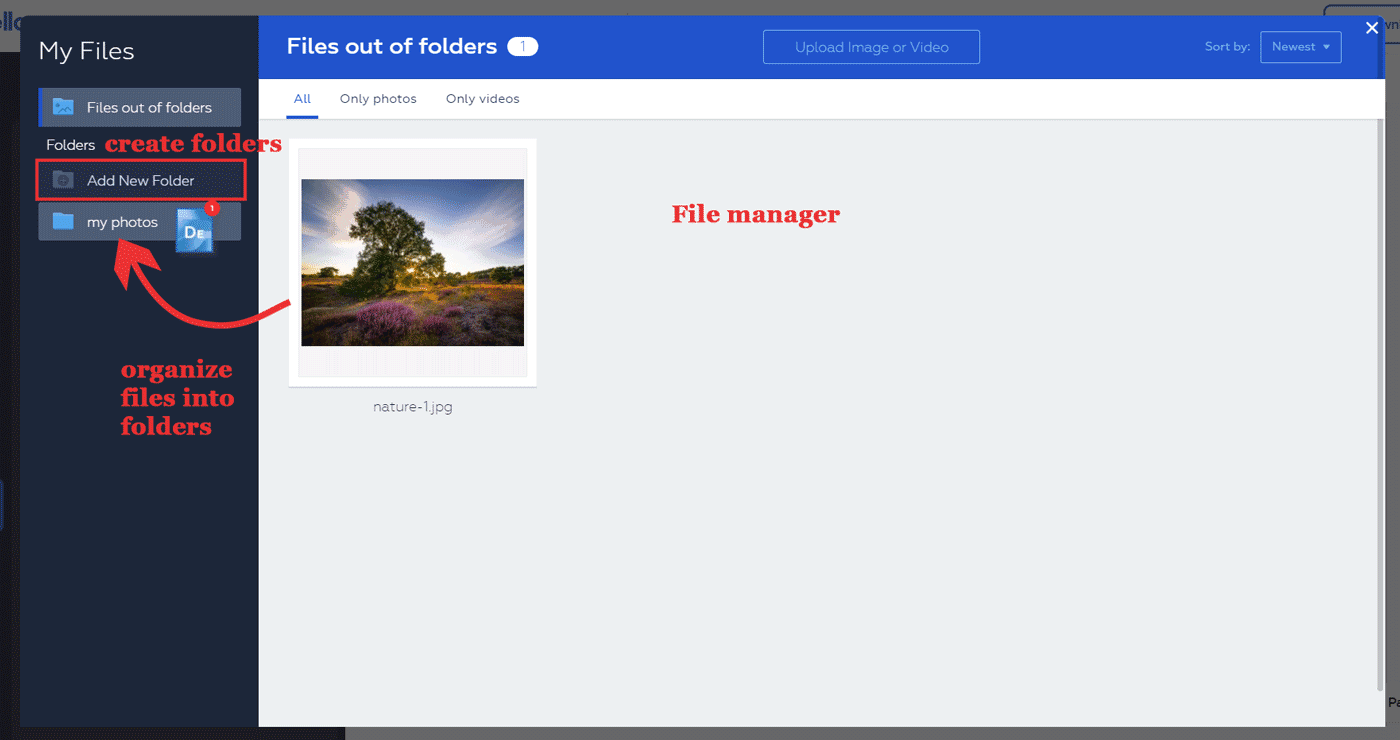
The uploaded files will appear below. To organize the files into folders, click on the Manage Files button, which will open a lightbox. There you can create new folders and drag-and-drop files into the folders.
Crello Review: Pricing
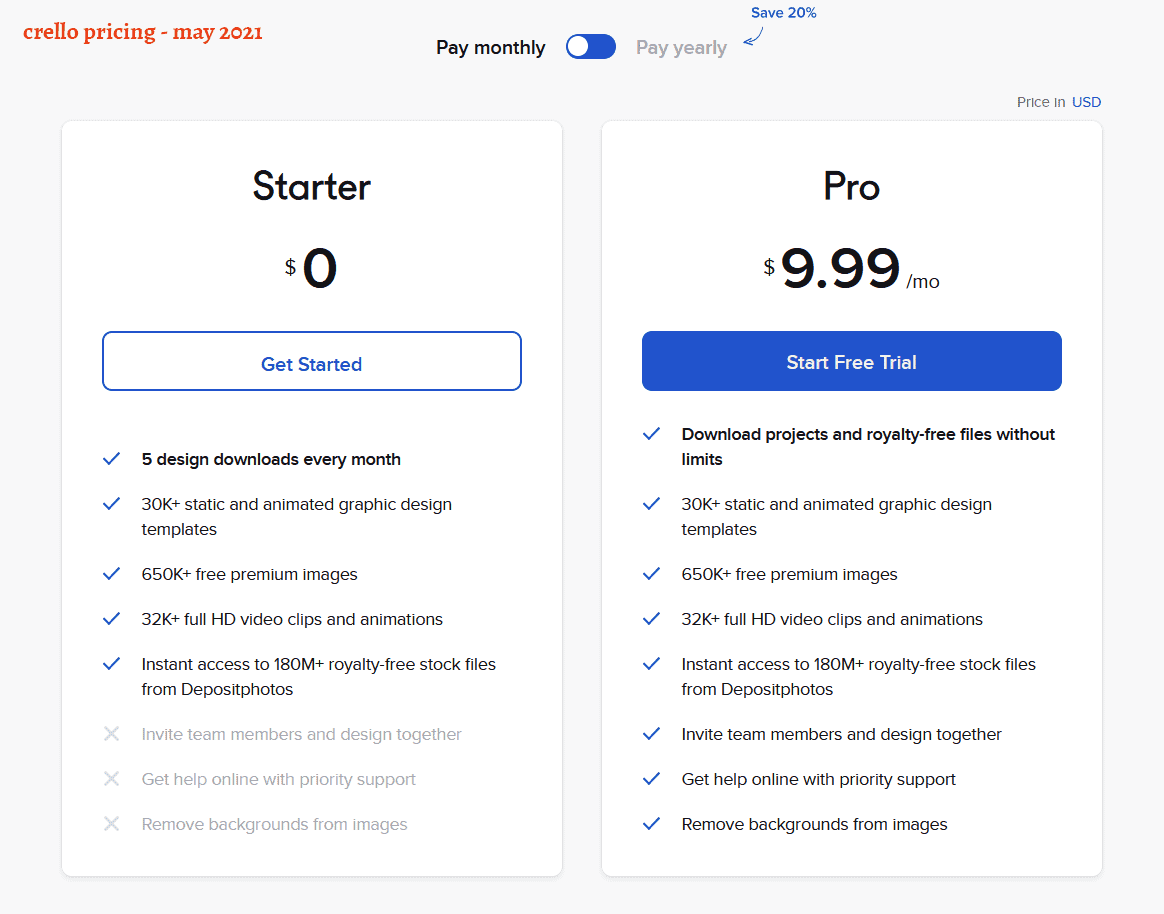
Crello offers two plans:
- Free, and
- Pro - pricing starts at $7.99/mo (billed yearly) or $9.99/mo (month-to-month billing)
Most of the features are available in the free plan, which is great thing. Team collaboration, priority support, background remover, and brand features are offered in the Pro plan only.
The fee plan restricts downloads to 5/mo. However, there is a referral program. When your friends or others signup with your link, you get more download quota.
Pros & Cons
Pros
- Variety of templates
- Good quality animations and backgrounds
- Pricing is cheaper than others
- The free plan has a lot of features.
Cons
- Video collection could be better
- No integration with free stock photo sites like Pixabay, Unsplash, or Pexels
- Free plan allows only 5 downloads/mo
Conclusion: Can It Replace Canva?
Overall, I had a good experience with Crello. It gave a more pleasant experience than Canva.
- So, will I replace Canva with Crello?
For now, I prefer using Crello alongside Canva. The latter's photo library and icon collection are so diverse. Also, the 5 downloads/mo restriction in the free plan makes it insufficient.
On the other hand, Crello's Pro plan is much cheaper. So, if your design needs are less, it might suit you better.
Another possibility is to use the free versions of multiple tools, and upgrade one of them only if you have more design requirements. That way, you can get the best of all tools, without spending a lot.
What are your thoughts? Have you used Crello? Mention your experience in the comments.

